I couldn’t resist the title for this blog post, since the block prominently features a plus sign, and I’d been feeling a little negative about this project when I began this block. I’m definitely enjoying doing everything by hand, but it is just so slow … there’s very little visible progress.
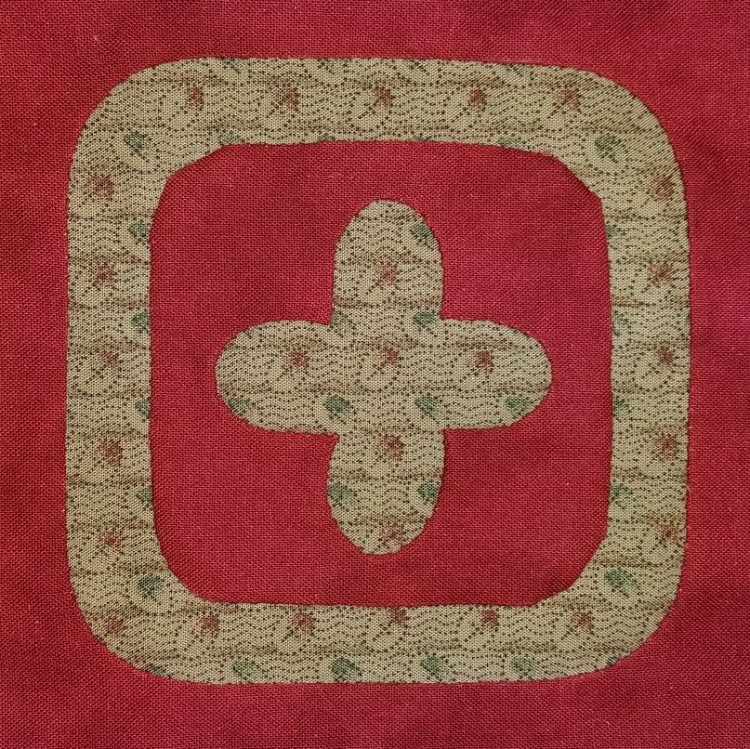
When I started it, I wasn’t sure exactly how to make this block. The “official” instructions had you take a base red square, then appliqué on a green square with rounded edges, then appliqué a red square with rounded edges on top of that, then finally appliqué the green plus sign on the top of that. At some spots, this block would have 4+ layers of fabric … too many layers for hand quilting.
So I put off doing anything for over a week while I debated how to approach it. In the meantime, I started a new machine-pieced project. I was a little worried that once I went back to sewing on my sewing machine, I’d never want to return to the slow pace of hand piecing … but it turns out the opposite is true. The sewing machine moved too fast, and was not the relaxing experience that hand sewing is for me. After one afternoon, I was glad to get back to this project.
After weighing all the options, I chose to do the plus block with reverse appliqué – a new technique for me.
It’s fairly similar to regular appliqué; the difference is that instead of cutting out the shape and sewing it on top of a background piece of fabric, you cut away the background fabric where that shape would be, revealing the “shape fabric” that you’ve placed underneath. Basically you are appliquéing the background “shape” onto a piece of fabric, instead of appliquéing the shape onto a piece of background fabric. Other than that, the actual stitching technique is identical.
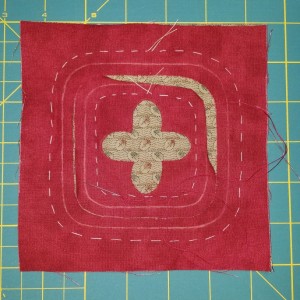
Here’s a picture of the work in progress. You can see I’ve already cut away and turned under the edges of the background fabric around the plus shape, and have started on the ring shape. Those big stitches with white thread (called basting stitches) are just to hold everything in place; they’ll be pulled out later.
One nice bonus of this technique was that you didn’t have to stuff all that seam allowance underneath the narrow plus and ring shapes. Instead, the seam allowance sits underneath the more expansive red fabric areas.
Another bonus is that the somewhat directional pattern of the green fabric looks nicely lined up in the finished block … because it’s all one big piece of fabric behind the scenes.
Some of my rounded edges are not that smoothly rounded, but overall I think the block was a success.
I wasn’t sure how many pieces to say this block was … but ultimately I decided I only get credit for two pieces, because that’s how many I cut out – it’s just one red square and one green square. I cleverly cut 6″ squares this time, and trimmed to the 5″ size after completing the block. Yes, it’s a little bit wasteful, but I’m glad I did it since the design shrunk up a bit during the appliqué process.
The good news is that while this block was a new technical challenge for me, it wasn’t dangerous like electrical reversed polarity. And my attitude polarity has reversed as well … I’m feeling much more positive about the project.
Very cool! I haven’t heard of that before.
Thank you
You’re welcome – hopefully it helps you with your G3 block too. 🙂
I love reverse applique. It seems so much easier to handle all the pieces. Your block turned out great
Me too! I’m so glad I tried it and was able to add this technique to my toolbox. 🙂