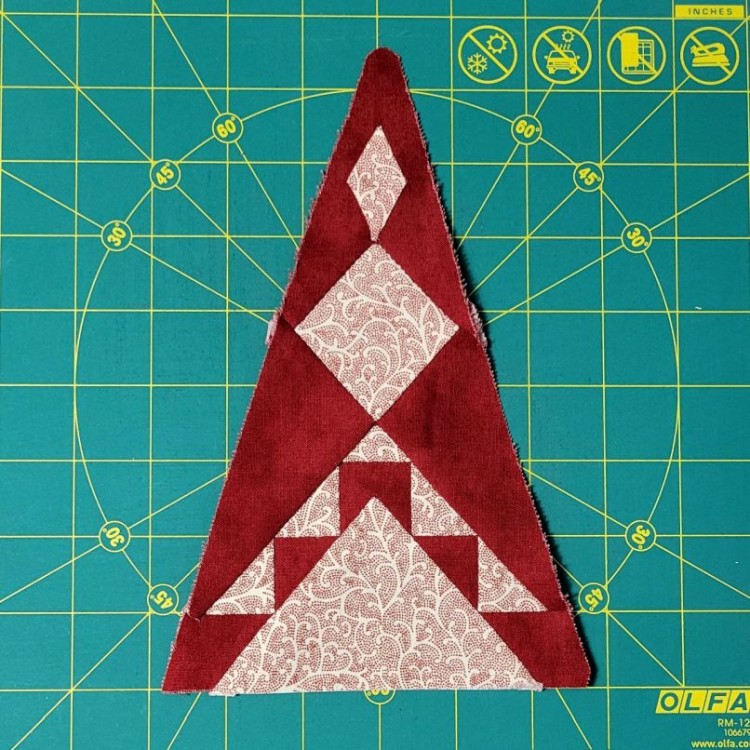
I’d thought this was a relatively straightforward pieced block, but when I looked more closely, it had two appliqué pieces (the diamond and on-point square at the top). I just can’t escape from the appliqué.
It doesn’t seem like I can avoid appliquéing the diamond, but I see no reason that the on-point square can’t just be pieced … the points go right up to the edges of the block.
Sure, I have to inset a seam between the diamond and the square, but by piecing the square, I eliminate the inset seam at the bottom of the square. So, I come out with the same number of inset seams (and reduce the amount of appliqué I have to do!). I’m happy with my choice.
Of course, between all the appliqué and the inset seams (mine or Jane’s), there was no foundation piecing option in the Dear Jane software for this block.
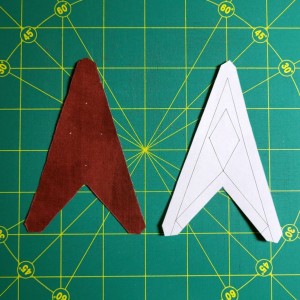
So instead, I just printed out the whole block outline on Avery label paper to use for templates. The advantage there is that the triangle block wasn’t in sections … everything was all together, so I could have registration marks for lining up all the pieces.
I also printed out the templates for this block from the software, so I’d have the appliqué diamond template ready to go.
The only tricky part was needing to make a pattern piece for the part of the block that is above the square. I ended up printing out another outline of the block on regular paper and drawing lines 1/4″ outside that part of the outline to make a pattern piece for that part of the block:
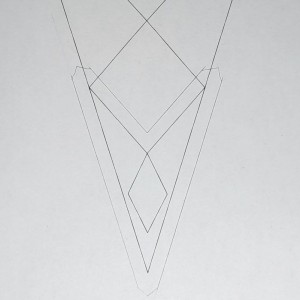
This actually worked really well, and I could even use the same pattern piece to mark where the appliqué diamond was supposed to go:
Once that was done, I appliquéd the diamond to my makeshift piece, slapped the Avery labels on the back of this piece and the square below it, then inset the square. In fact, I inset it twice, and I’m still not quite happy with the result, but I’m not doing it a third time. There’s just too much going on between the appliqué diamond point and the stretched to the max inset corner to get it perfect.
At that point, I took a break from stitching to cut out all the other pattern pieces. Since this fabric is a little bit directional (I wanted all the cream fronds to be right side up), I needed to be careful when cutting them out. But I somehow managed to do it upside down on a few pieces, so I had to go back and fix them.
Of course, now that I’m writing this up, I realize that this triangle is on the bottom row of the quilt, so they will appear upside down when the quilt is right side up anyways.
Next, I put together the zigzag section at the bottom of the block, and then inset the large triangle into the zigzag section (not only can I not escape appliqué, I can’t escape inset seams either).
Once the two tricky parts of the block were done, assembling the rest was basically just like making a four patch block – easy peasy!

After all the design modifications, inset seams, and appliqué in recent blocks, I’m ready to escape all the complexity and get to work on a nice, simple, 49-pieces-in-a-4.5-inch-square block.
I noticed you use Avery label paper for your templates. Is that better than wax paper? Does it stick better? As always I enjoy your blogs on DJ!
I like the Avery labels because you don’t have to mess with ironing them on to the fabric, and you can easily print out the pattern pieces from the Dear Jane software directly on to the labels. But it does make the needle a bit sticky. 🙂