The title of this blog post comes from my intense dislike of the fabric in this block. It’s done in traditional camouflage fabric colors, but instead of random splotches, it has fussy little green and brown flowers in it, and random fat swirly lines. So thoroughly not my style, and I never would have picked this fabric myself (Paulette did, of course, and I’m trying to honor her original design throughout this project).
Here’s a picture of the fabric:
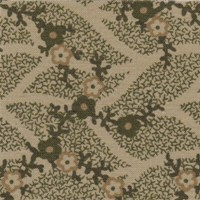
Trying to make the best of a bad situation, I attempted to fussy cut the pieces so the fat swirly lines followed the lines of the pieces. The block is intended to depict a sun with rays extending out from the center, so I thought the swirly lines might help reinforce that interpretation.
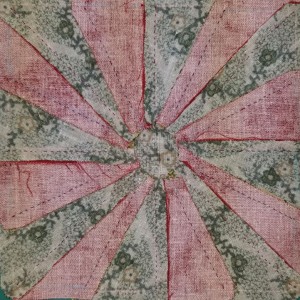
Unfortunately, in these murky colors, mine looks more like an octopus than anything else.
I knew that this block was going to be super bulky in the center, where all those seams met up. So, my strategy was to not sew all the way to the end, and then once the circle was appliquéd on, I could trim some of the ray fabric from the center, reducing bulk.
At least one other blogger had the same idea, and gave directions for hand piecing this block, including how far from the center to start stitching. The problem was that their measurement for this distance just showed up as a box in their blog entry, instead of the actual measurement. I suspect that it was a fraction, and the font they used to show that fraction was not supported by my browser. Foiled by fonts!
So, I made some educated guesses: the circle would be 1 1/2″ (see, that’s how you do fractions on the web) across when it was finished, so half of that would be 3/4″. You would also have to account for the 1/4″ seam allowance on the rays, so I figured the edge of the appliqué would come down about an inch from the top of the cut out ray pieces. I wanted to have a little bit of overlap, so I settled on 7/8″. Math to the rescue!
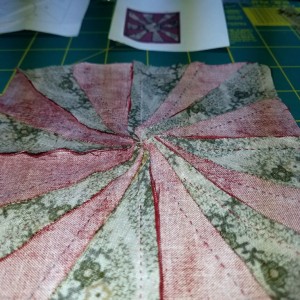
My plan worked beautifully. I sewed together all the rays, stopping my stitching 7/8″ from the center. You can see how much fabric was in the center before I trimmed:
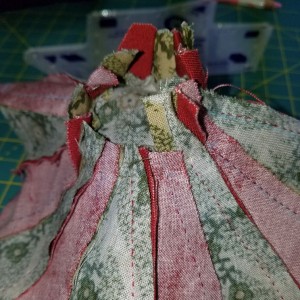
I appliquéd on the circle, then flipped the block to the back and started trimming the inside ends of the rays (looks kind of like a volcano, doesn’t it?):
Now it lays much flatter, and there will be less excess fabric to quilt through later:
The last bit of frustration with this block came when I realized the finished product was 1/2″ taller and wider than was called for. I used the pattern pieces from the Dear Jane software, so maybe they designed the pattern pieces a little extra big to give you wiggle room.
I trimmed 1/4″ off each edge of the block without even thinking about it, then noticed that my trimmed off bits included the knot at the end of the thread. So, now there’s nothing to keep my seams from unraveling on all 16 rays. Grrrrr. At some point I’ll probably go back and re-stitch these, but for now, I need a break from this block.
This is block number 36, so I thought I would take a photo of my progress so far in a 6×6 grid, for inspirational purposes:
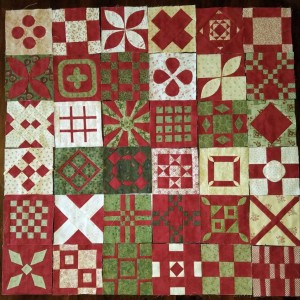
I’m glad I did, because looking at this picture, I realize that mixed in with all the other blocks, this super ugly fabric doesn’t stand out that much. The Victorian Camo is effectively camouflaged among all the other blocks of the quilt.
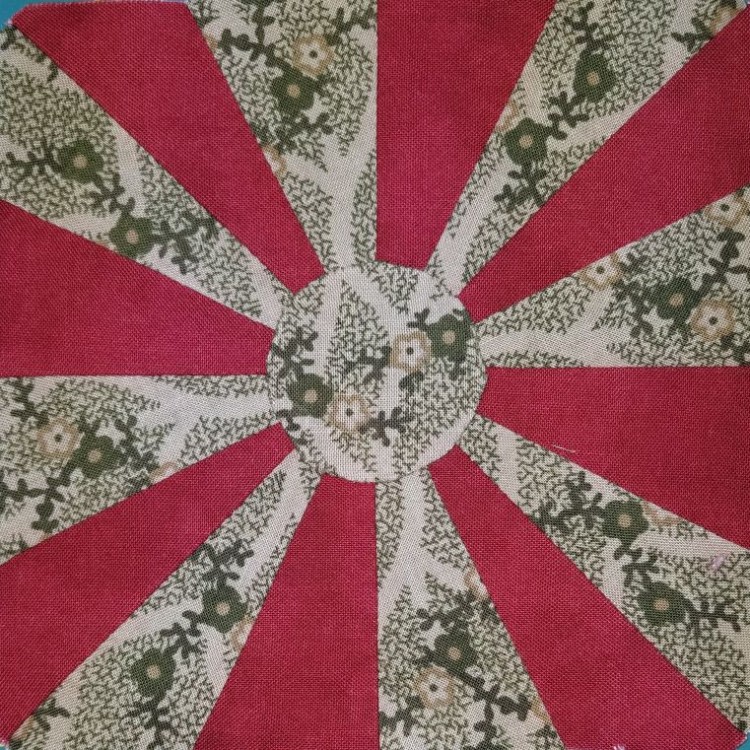
That looks really tricky! When I first looked at the block it reminded me of the Japanese flag from WW2.
Who is Paulette??
Paulette is the person who originally assembled the fabrics to make this quilt. She passed away a few years ago, and the supplies for the quilt were sold, nearly intact, to a novice quilter at her estate sale. I got the supplies third hand from the novice quilter, who wanted to see Paulette’s vision completed, but felt like her quilting skills were not yet up to the challenge. Click on Paulette’s name in the blog post, and it will take you to an earlier blog post where I talk about the history (the provenance?) of the supplies.