I ended up choosing this block out of order, because my August sashing goal took up so much of the month. I needed a quick block, and this one fit the bill. I finished the sashing on the 25th, and upon waking up on the 26th, chose this block, and got started on it right away.
The consensus on Dear Jane sites seems to be that reverse appliqué is the best technique for making this block. Without a lot of time to contemplate my options, that’s exactly what I did.
I had not done reverse appliqué for awhile, so I referred back to the article I wrote the first time I did it for a quick refresher (see, this blog helps me, too!).
With this technique, the cutting out is pretty easy – just two 6″ squares. I made them extra large because sometimes the fabric cinches up a bit while doing appliqué (although it didn’t do that too much this time – my skills must be improving).
The pattern pieces were relatively simple as well – I just printed out the block outline from the Dear Jane software, added 3/4″ on each side of the drawing (1/4″ for seam allowance and 1/2″ to make the pattern 6″ wide, matching the size of my fabric pieces).
I cut out the 6″ pattern piece and then clipped out the five shapes for the appliqué. Then it was a simple matter to place the pattern piece over the floral fabric and trace inside each of the shapes:
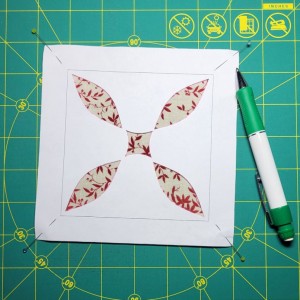
There was mild drama because only one of my three chalk marking pencils was in my sewing box, but I quickly found the second one between the couch cushions, and later in the evening, discovered the third had fallen to the side of my desk. Luckily, this did not set me back for very long.
With the shapes to reverse appliqué clearly marked, I placed the floral piece on top of the plain red piece, and basted around the shapes, a little over a quarter inch away from the marked lines. Of course, some of the shapes were a little close together, so I just went around them as a group of five, rather than basting around each one individually (sorry, folks, no photo of this phase – I was in too much of a rush to get it done).
Then there was a little more drama because I couldn’t remember what color of thread was recommended for reverse appliqué. A quick Google search suggested that the thread should match the top piece of fabric.
So, I went with a very pale ivory thread … in hindsight, I’m not sure this was really ideal, because there are places where there is a small, very noticeable ivory stitch nestled between the red fabric and a red part of the floral fabric. But I’m not sure that red thread would really have been better.
The stitching went quickly, as I’d hoped. I’d just gotten some new Piecemakers appliqué needles, so this gave me a good excuse to try them out. For appliqué needles, they are relatively easy to thread. I think they’re winners.
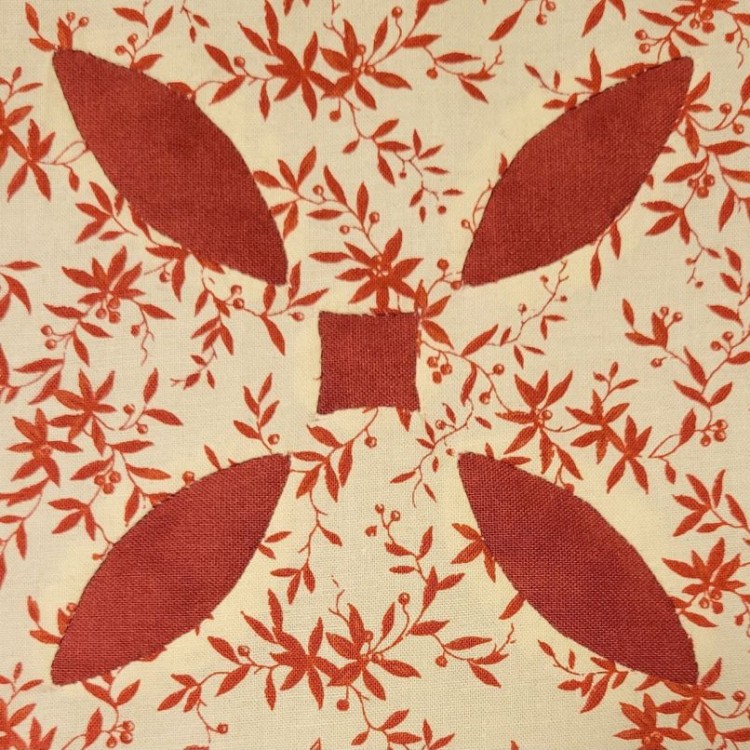
Unfortunately, the melon points on this one are pretty pointy, as were the extra pointy corners of the “square” in the middle. With regular appliqué, it would have been difficult to stuff all the seam allowance under all those pointy points, but with reverse appliqué, it was tough to avoid fraying when working with super-minimal seam allowances at the points.
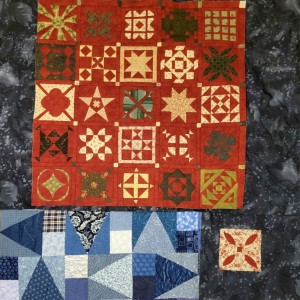
With the sashing and the Dear Jane block out of the way for my monthly UFO Challenge goal, I scrambled to meet my rainbow quilt portion of the goal (18 triangle motifs) over the last five days of the month:
The jury is out on whether reverse appliqué was the right technique for this block. My points are not nearly as pointy as desired. But the block is done (in a single day!) with only mild drama.
Bonus: I wrote the draft of this blog article in about 15 minutes that same day, while the mild drama was still fresh in my mind. Of course, it took another 2 weeks to actually publish it …