This was the block I’d been stewing about how to construct at the end of March. I decided that once we were at the start of a fresh month (April), I was going to finally figure it out.
I opted to tackle it during my guild’s spring quilting retreat, which was both fitting (because that’s where I acquired this bird fabric), and risky (because there’d probably be a lot of cursing as I tried to figure out how to assemble it).
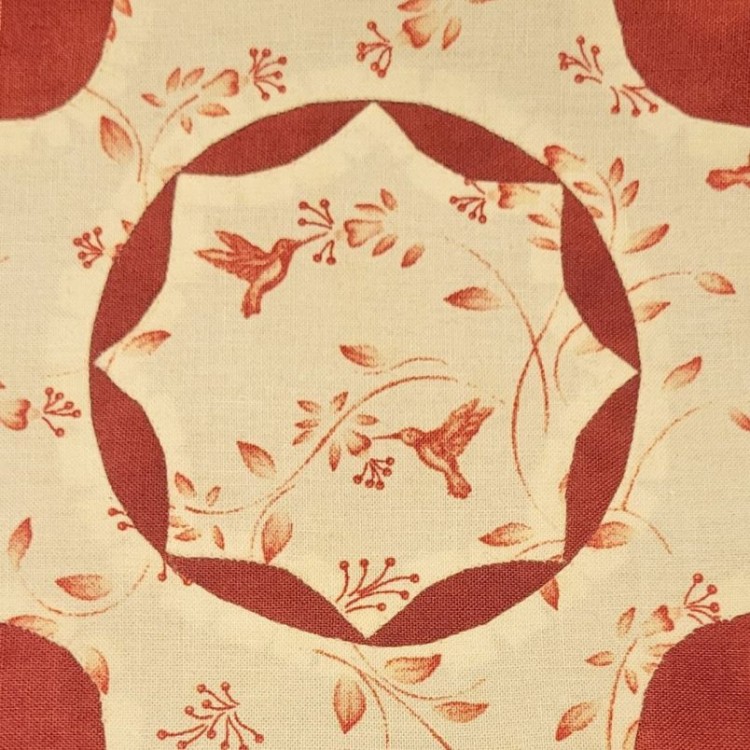
The bird fabric seemed perfect for this block that featured a large center section of print fabric; there was a two-bird motif that just fit inside that center section. It’s like it was meant to be.
But there were so many possible ways to assemble it that I was unsure which route to take. I was a little confused about which pieces were what on the pattern from the Dear Jane software, which included three pattern pieces: one for the star in the middle, one for the quarter circles at the corner, and one for a big circle. Edit: now that I go back and look at it, there were four pieces; there was one for a square the size of the full block too.
So, I started out thinking I would approach the block by appliquéing eight melon shapes on to a single 5″ square of the bird fabric. I printed out the Susan Gatewood patterns at home before I left for retreat, since the Dear Jane software didn’t have pattern pieces for the melons.
Once at retreat, I cut out a 5″ square with the birds centered as much as possible, and marked the melon points on this piece. I also drew a circle on the bird fabric corresponding to the outside edges of the melons, to help place them accurately on the piece of bird fabric.
Then I tried to cut out the Susan Gatewood melon pattern pieces, but discovered I’d printed them out too big somehow. Stuck at retreat with no access to a printer, I improvised my own melon pattern from an outline drawing of the block, but realized at that point that the melons were way too narrow and pointy to appliqué accurately.
So, I circled back to the idea of appliquéing the star piece from the Dear Jane software, and then fashioning a ring-shaped pattern piece to reverse appliqué on to a square of the red fabric.
Now I had a dilemma. I had limited bird fabric (only three instances of the two-bird motif), and I’d already used up one of them cutting the background square to stitch melons to. Then I used a second two-bird motif to cut out the star shape once I realized the melons weren’t going to work out. Would I have enough fabric to complete this block?
Tabling those worries for the time being, I cut out a red 5″ square and marked the location of each of the star points. Once I appliquéd that star piece on though, I had to decide if I was definitely abandoning the melon plan.
Ultimately, I decided I was indeed abandoning the plan, and could reuse the 5″ piece of bird fabric that I had cut out to appliqué the melons to. Since I’d already marked the circle around the edges of the melons, all I had to do was cut out 1/4″ inside the circle, and pin it in place to reverse appliqué to my red square with the star.
Doing the star first made it pretty darn easy to line up that ring-shaped piece; I’d even marked dots on the ring piece where the points of the melons were supposed to go, which could be lined up with the star points instead. Once I reverse appliquéd that piece, I just had to reverse appliqué the corners, and the block was done.
My only regret was that I had not cut the red square a little bigger, because this one somehow bunched up more than my appliqué usually does. I’ll just need to account for that with a smaller seam allowance when sashing to adjacent blocks.
After all that pivoting to different assembly approaches, I came full circle back to a three-piece pattern almost like the original Dear Jane software pattern.