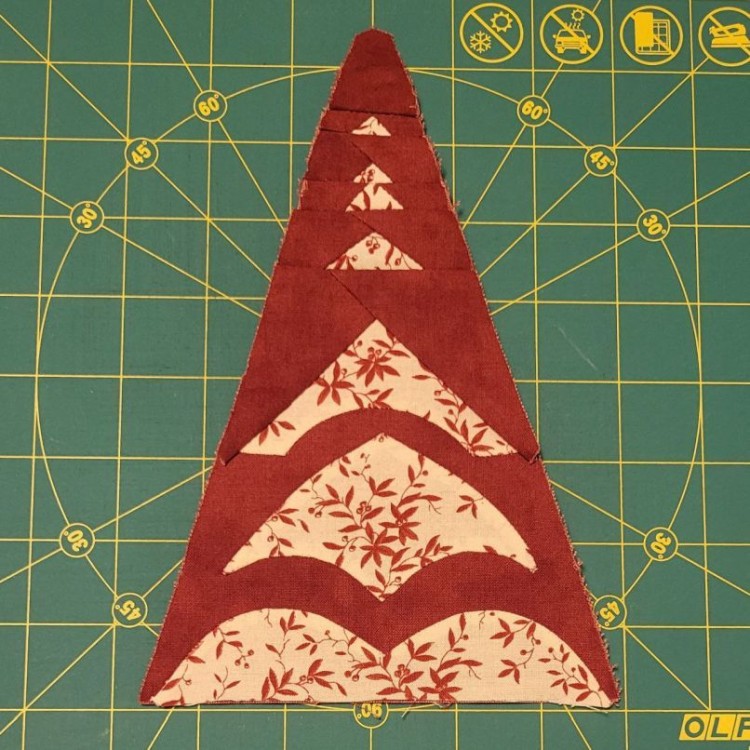
There were so many possibilities for constructing this one! Since it wasn’t immediately obvious how to put it together, I went to all my usual sources to see how others had done it. Some appliquéd the bottom three pieces (and there was much dissension about the correct treatment for the top piece of the three).
One source even suggested appliquéing all of the focus fabric pieces onto a single piece of red background fabric. This had some appeal (and you know this is not your typical block if I’m considering converting regular piecing to appliqué!).
But I took a look at the size of the smallest triangle up at the top, and wasn’t sure it was physically possible to stuff all the seam allowance underneath it.
So, in the end, I went for a hybrid approach, piecing the top half of the block and (mostly) appliquéing the bottom half. I say “mostly” because I didn’t feel like I could appliqué in such a straight line, so I chose to piece the straight edges of that top appliqué piece.
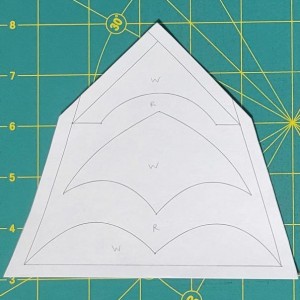
But how to get a background piece of the right size to attach those appliqué pieces to? I printed out the block diagram, added 1/4″ around all sides, and cut it out. This gave me a template piece of the right size, plus it had the outlines of the appliqué pieces printed on it, so I could easily line those up in just the right spots:
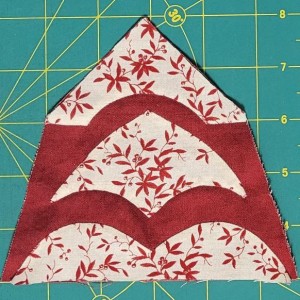
I appliquéd the middle piece (the one that looks sort of like a hang glider) all the way around.
Then I appliquéd the bottom piece along its top edge only. The part along the bottom will be stitched to adjoining blocks when I assemble the quilt (well, technically, it’ll be sewn to a sashing strip to connect it to the adjacent square blocks).
For the top piece, I appliquéd along the bottom edge only, leaving the top unstitched. This would be stitched to the pieced parts in the rest of the block, so there was no need to appliqué these edges down.
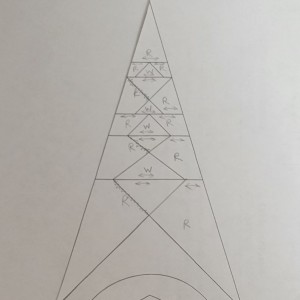
Then I got out my trusty Avery labels and stitched two red pieces on to the bottom piece, plus the top half of the triangle block using my usual method.
And by usual method, I mean that I did it slightly different than the Dear Jane software called for, as usual. They put in a lot extra seams that just didn’t seem necessary to me, so I eliminated them.
Instead of having three red pieces around each triangle, I just had two red pieces that overlapped each other. I made sure to overlap them all in the same direction (right over left), and I think it looks like it was meant to be that way.
The bonus here is that there’s a little bit less seam allowance bulking up the top part of this triangle block.
I was definitely flying (hang gliding?) by the seat of my pants to make this hang glider block, but I came in for a smooth landing at the end.
On to the next block!