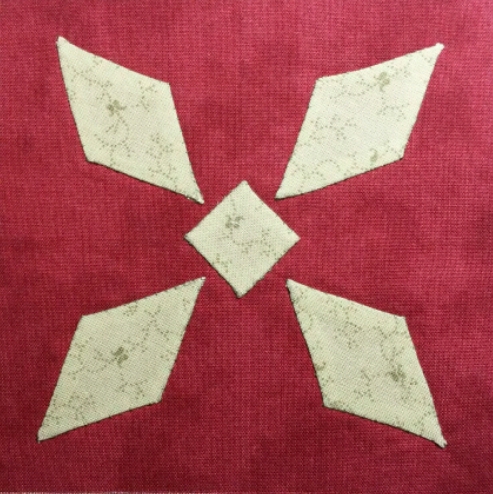
Before I started this block, I had all kinds of ideas of what I was going to write about. I’d considered talking about how this was an appliqué diamond rematch, after my initial efforts at appliquéd diamonds in November.
I’d thought about following up on December’s fussy cutting post and talking about how not fussy cutting this green paisley fabric, I ended up with none of the paisleys on the fabric showing up on any of the appliqué pieces in the block.
Shortly after I started sewing though, it became clear that this block was going to be all about The Snag.
Someone recently sent me an article about how the fabric you buy at big box craft stores like JoAnn Fabrics are of terrible quality, and you need to invest in designer quilting fabrics bought at local quilt shops or your project will be an abject failure.
I’m not sure I really buy into this theory though. The red fabric that features so prominently in this quilt is Moda brand (for those not in the know, this is one of the “fancy” brands of quilting fabric that all the cool kids have).
I’ve had nothing but trouble with this fabric. It unravels like crazy, for one thing. It is also extremely prone to snagging (kind of like getting a run in your stockings). And it’s not like it’s just a slightly different texture where it snagged, because the red pattern seems to be just dyed onto white fabric … so the snag is bright white.
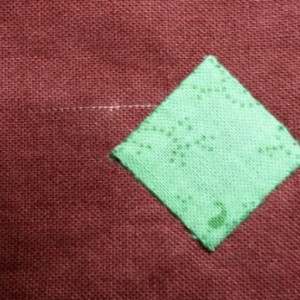
Naturally, this happened as I was finishing off the first appliquéd piece, as shown below:

I’d tied off the thread on the back of the red piece after appliquéing this square, and was trying to pull the knot through so it was hidden between the green fabric and the red. This was too much for my wimpy, wimpy Moda fabric, and suddenly I had a giant snag in the fabric.
Of course, the pattern is one big red piece with all the green pieces appliquéd on it, so I had to start over with a new big red piece. There’s no coming back from a snag like that.
This made me cranky and I had to ignore the block for over a week in protest.
While I was visiting my parents over the holidays, I was bemoaning the snag to my Mom, and she asked why I didn’t just leave the knot visible on the back. After all, it was going to be hidden behind a fluffy layer of batting and the backing fabric when the quilt was done. Nobody was going to see this knot.
Here’s where the roasting pan comes in. I’m sure many of you have heard the story of the woman who cut both ends off her roast before putting it in the pan.
When asked about why she did this, she said that it was the way her mother had always done it. When the mother was questioned about the practice, she said it was the way her mother had always done it. The grandmother’s answer was more illuminating: she cut the ends off the roast because her roasting pan was really small, and the roast wouldn’t fit unless you cut a little bit off the ends.
I’m not sure where this practice of hiding the knot came from, but I’ve been doing it for as long as I’ve been appliquéing. That’s a long time, as evidenced by the 12-year-old unfinished appliqué pillow project.
I only found one appliqué book in my extensive quilt book collection that specifically mentions hiding the knot. The rest of them just say to tie off the thread, and don’t get any more specific than that.
The new Better Homes & Gardens appliqué book I got for Christmas illustrated all the steps with photos (my favorite kind of book for learning quilting techniques), and they clearly showed the knot just hanging out on the back.
So, I’m going to listen to my mother, and the good folks at Better Homes & Gardens, and blaze new roasting pan trails with my non-hidden knots. It sure makes these appliqué blocks go faster.
