One of the great aspects of hand piecing is how portable it is. A single block doesn’t take up that much space, and you don’t need any bulky equipment (or a power source!).
So, I can make progress on my project from just about anywhere. Of course, I work on it at home, but I make just as much progress during quilt guild meetings, at school events, and while waiting at the doctor’s office. I was laughing with my doctor last week about how I hadn’t had enough time for quilting lately, so I had to make an appointment with him to get some quilting done.
The assistant at my dentist’s office always oohs and aahs over my latest block, and then tells me about her beading projects. All kinds of crafters can bond over their shared love of crafts.
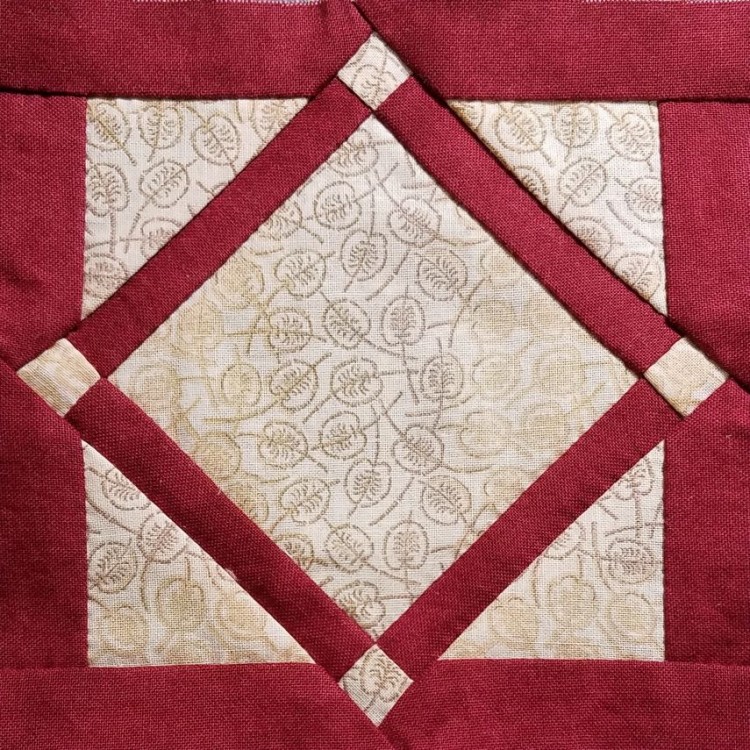
The block above was made almost entirely on the go: at two different doctor appointments, and on a short road trip over the Labor Day weekend.
To make it easier to take my quilting on the road, I use a small zippered bag that was originally intended for golfers:
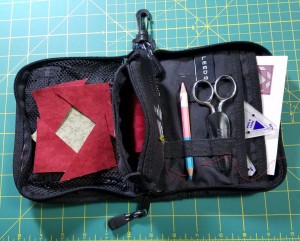
That middle pocket is supposed to be for golf balls, but it fits a big spool of thread (or two small ones) perfectly. I pin a few extra needles and a handful of pins to the side of this center pocket, for easy access. The elastic bands for holding tees work great for holding my marking pencil and scissors. Side pockets hold small rulers and notes. There is a clear plastic pocket on the backside where I keep my beeswax. I usually just set the fabric pieces loose inside, as shown above. Once the bag is packed, the two sides zip together to keep everything safe and secure until it’s time to stitch.
The one thing that is tough to do on the go is cut out the fabric pieces, so I was scrambling to get everything cut out for this block before leaving town.
What I hadn’t realized is that this fabric has a wide “stripe” pattern. I put the word stripe in quotes, because it’s not really stripes of different colors so much as bands where the design looks faded. I’m still not 100% sure whether that was on purpose or a problem during the printing process.
The pieces of the block were a little too big to fussy cut in only one stripe color, and they were a little too small to have multiple stripes visible (thus making it clear that they are indeed stripes). So, it was a challenge. I ended up cutting the center diamond with the stripes running vertically, and the corner triangles with the stripes running horizontally. That way, at least I didn’t have to worry about lining up the stripes across multiple pieces. Hopefully it looks purposeful, and not just like I used low-quality, faded fabric.
The stripes ended up being the major challenge of this block. I was well-prepared for the rest of it after the last block I did … both feature center diamonds with the world’s skinniest border and the world’s tiniest cornerstones connecting the border pieces.
The only moderately tricky part was that I’d somehow gotten it in my head that the edges of those outer borders were going to line up with the corners of the cornerstone blocks, and they don’t. Instead, the outer red border pieces overlap the inner red border pieces a little bit. Once I stopped trying to make them line up with each other, it went a lot better.
Now it’s on to the last block in my diamond in a square series. If you look closely at the picture of my travel kit, you’ll get a sneak peek at the block I’m doing next. I have jury duty this week, and that seems like an excellent opportunity to use my travel kit and finish this block while I wait.