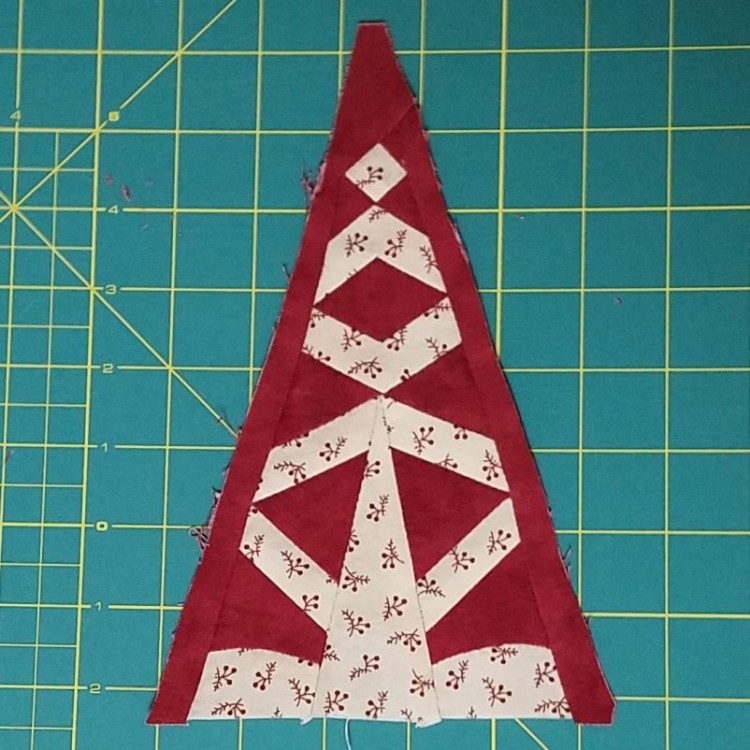
The design at the base of this advanced difficulty triangle makes me think of a frog getting ready to jump.
As I was preparing to make this block, I was thinking of the WB frog, who sings and dances only when people aren’t watching it. Like the WB frog, I work better when nobody’s looking, so I was concerned about tackling my first advanced difficulty triangle while at a quilting retreat … but I’ve fallen behind a bit on my block-making schedule so that’s where it ended up.
The first snag I hit was in printing out the block pieces on Avery label paper. I couldn’t get the picture of the quilt block to mirror in the print setup, and I couldn’t print it as a foundation piecing pattern at all. At least this challenge was faced in the privacy of my home, instead of in front of everyone at retreat, but it was still quite frustrating.
I was starting to really think outside the box, and even considered printing the block on the label paper backing instead of on the label side. This way, I could cut out the pieces along the lines on the back of the paper, and when I flipped over to the label side, the pieces would be mirrored.
Before I had to resort to this technique, I discovered that if the block couldn’t be foundation pieced, you could still “pretend” you were going to foundation piece it by manually clicking to select each of the pieces. Then the entire block would print out in foundation piecing mode, where the mirror setting actually works.
By the time I got to retreat, I had the pattern pieces figured out, and I could focus on the stitching, starting with the curved seams of the frog “legs.”
I’d done inset seams with labels before, and thought they were difficult, but using the labels on curved seams was truly awkward. Trying to hold a concave and convex curve together along the whole length of the curve, while both are stiffened by a label, was next to impossible. I ended up doing one stitch at a time, repositioning the two pieces after each stitch.
Once I got those curved seams out of the way, I sailed along. First I pieced the frog “arms,” then attached all the frog limbs to the center triangle of the frog body.
The inset seams around the red diamond above the frog were a breeze after those curved frog legs. At that point, I was left with these pieces to assemble:
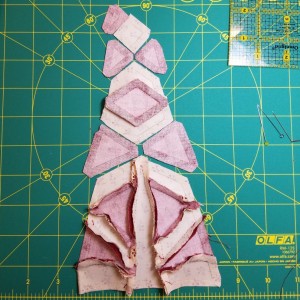
I opted to sew them into three diagonal “rows” to avoid more inset seams:
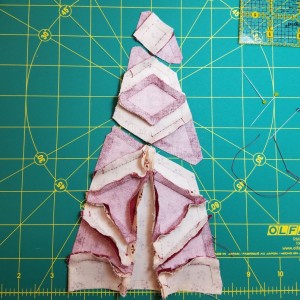
Once the rows were sewn together, I had just three more pieces to sew on: the two skinny red strips along the sides of the triangle, and the red triangle point at the top.
When I was researching to see how other people tackled this block, I noticed that Frances at Fabadashery opted to remove the ridiculously narrow side strips entirely to “eliminate any unnecessary aggravation during construction.” Now I’m kicking myself that I didn’t do the same on my block.
Those bulky side strips caused me a lot of unnecessary aggravation when I tried to add the triangle point. There were so many small pieces coming together there, including the extra skinny ends of those two side strips, that I had a lot of trouble getting everything to line up. It probably didn’t help that it was at the end of a long day of quilting and I was tired.
After about eight tries at pinning it, I finally decided it was good enough and stitched it up. It’s no coincidence that the eighth (and most successful) try was done when nobody else was around. The WB Frog and I both perform better without an audience.