I had originally planned to do a different block here, but I was undecided about what fabric I wanted to use, and dragging my feet about getting started, so I ended up punting it by switching to a different block that I could get started on right away.
The block went together pretty quickly (despite being pretty much entirely curved piecing, which is not my favorite), but then it took me forever to write this article about it, because I didn’t feel like there was much interesting to say. Then this morning I was cleaning up some papers on my desk and a small blizzard of Dear Jane pattern pieces fluttered out of the stack of papers … and just like that, I had my article idea.
One of the main drawbacks of curved piecing for me is how difficult it is to draw the stitching lines on curves. With straight lines, it’s easy – you line up the 1/4″ mark on your ruler with the straight edge of the piece (which is nice and straight, because you were easily able to rotary cut that line!) and away you go. I’m simplifying it a little, but you can check out one of my early posts for the full details about making a properly scant 1/4″ seam allowance.
With curved piecing, rulers are not helpful for marking the stitching lines: you need a pattern to trace around instead, and you have to line that pattern up somehow with the edges of the pieces, which were of course cut with scissors and may not be perfectly accurate curves. In the past, I’ve dealt with this by cutting out the pattern with seam allowances, cutting out the fabric pieces with that pattern, then snipping out the middle of the pattern piece in order to leave just the ring of seam allowance that goes around the piece.
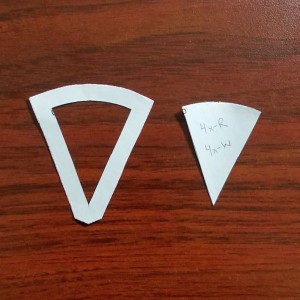
Then, similar to my technique for scant 1/4″ straight seam marking, I place the ring on the cut out fabric piece, align the pattern “filling” piece in the middle of the ring, then carefully hold the filling in place while removing the ring.
It’s trickier than it sounds, since the ring is an actual ring. You have to hold the filling in place with a finger, start to lift up the ring with your other hand (you won’t get very far, because you are pulling the ring onto the finger that’s holding that filling in place), then slide a second finger underneath the ring to hold the filling in place, so you can lift away the first finger and the ring. And all without shifting the filling out of place on the fabric piece. It’s got all the breath-holding, mind-boggling intensity of a game of Jenga. I’m exhausted just describing it.
Once the ring has been removed, then I just trace around the filling to get my scant 1/4″ on curved pieces. I used this technique for the wedge pieces that make up the center circle for this block.
But it’s kind of a hassle to cut the filling out while leaving the ring intact, and then to keep everything in place while tracing. Since the remaining pieces of this block all had at least one straight edge on them, I decided to try a new technique with those pieces.
I left the seam allowance on for the straight edges of those pattern pieces. Once I cut away the seam allowance on the curved parts of the pattern piece (as shown below), I could line up the straight edge(s) of the pattern piece with the cut edge(s) of the fabric, and only had to trace the curved part of the stitching lines. The straight parts of the stitching lines could be marked with rulers in the traditional way.
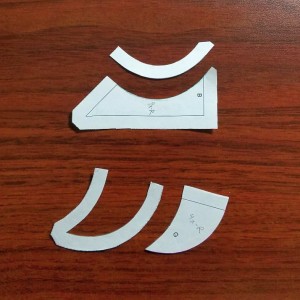
This technique definitely made it easier to prepare the pattern pieces, and it was easier to not accidentally move the pattern piece while tracing, since I didn’t have to remove an outer ring or shift my fingers to trace around the entire pattern piece (the pattern piece is more of a peninsula than an island).
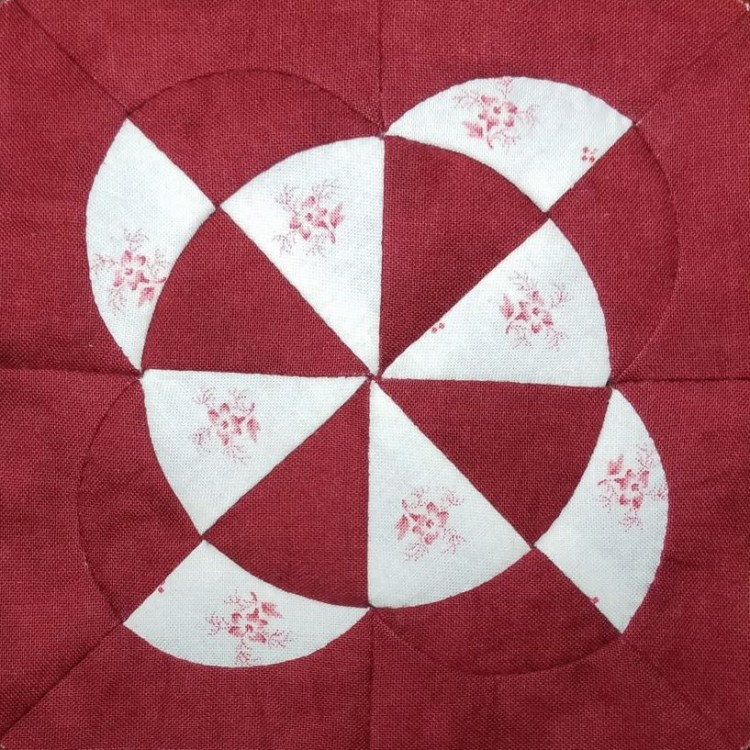
Once the pieces were cut out and marked, the stitching went quickly. There are a couple of different ways you can tackle this block – either build the four quarters of the block and then sew those four square sections together, or work your way through the concentric circles of the block design. I opted for the latter.
First, I sewed together the wedges to make the center circle. Then I sewed the little comma pieces together in pairs, as well as the border pieces.
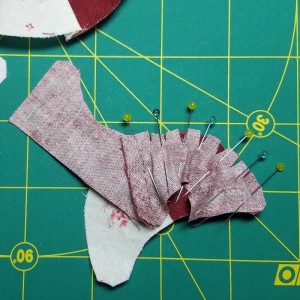
Next I attached the little comma pairs to each of the border pairs – it was a pretty tight curve, but I was able to subdue it with lots of pins.
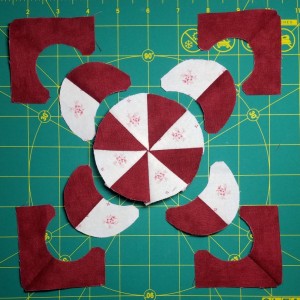
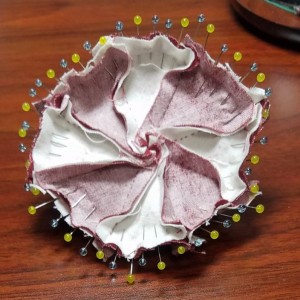
Once those four outer sections were done, I attached them to each other to form a ring. Then it was just a matter of sewing the ring around the center circle – which was not complicated, it just required a ridiculous number of pins:
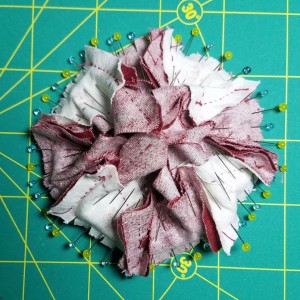
The above picture looks cooler with the pinwheel showing, but the mess below is what I was actually looking at while sewing this monster curved seam:
I’m still not crazy about curved piecing, but this new marking technique did take some of the stress out of making accurate seams. Still, I’ll be glad to get back to some straight line stitching with my next block.
Finally, I’ll leave you with a photo of the June progress on my 2021 UFO Challenge:
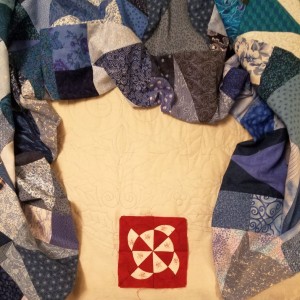
Again, only one Dear Jane block, but I did complete 4 leaves and 2 berries on the wholecloth holly quilt, and added another row to the rainbow quilt. You may notice that the edges of the rainbow quilt are oddly folded under. It’s because I got a little ambitious over the holiday weekend at the beginning of July, and sewed on another row before I remembered to take the June photo. I wanted to make sure the June photo only showed the June progress.