You might remember me lamenting about getting the seam allowances right in my earlier post: The Scant Quarter Inch.
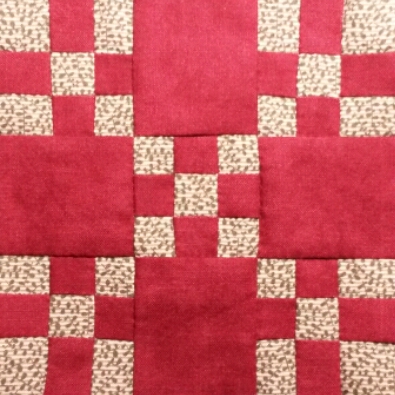
The latest block I completed has 49 pieces, and a whopping 48 seams, so I got plenty of practice with accurate seam allowances.
Somewhere around seam 27, I had an epiphany, which I’m going to share with you today. It had all the hallmarks of a good epiphany: the block seemed to be taking forever to complete; I was frustrated and tired, and probably loopy on cold medicine too. That’s when I realized that all this time, the quarter inch line hadn’t been where I thought it was.
Here’s the scoop.
When people talk about the scant quarter inch, they are talking about the distance from the edge of the fabric to the line of stitches. So when you’re sewing on a sewing machine, you’re looking at the distance from the edge of the fabric to the place where the sewing needle goes into the fabric. It’s pretty clear-cut.
Hand sewing is a little different, however, because you mark the sewing line (well, I do) with a marking pencil before you stitch. I measure with a ruler from the opposite side of the seam I’m marking; so if it is a 2 1/2″ square piece, I will measure 2 1/4″ up from the bottom, and draw my line against the edge of the ruler, as shown in the picture below.
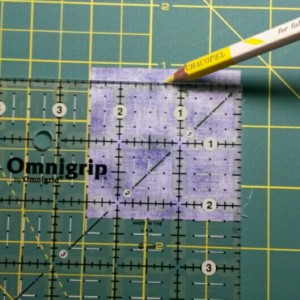
Here’s where it gets crazy: the pencil tip doesn’t reach right to the edge of the ruler (maybe because of the width of the pencil tip itself?), so you end up with the line slightly outside the quarter inch line. The scantness is built right in!
Is your mind blown yet? It should be.
So, I’d been marking a line that was secretly a scant quarter inch, and then stitching slightly above it (thinking it was the true quarter inch, not the scant one), thus making my seams extra scant. Now I know I can just sew right on the line and end up with a perfect scant quarter inch.
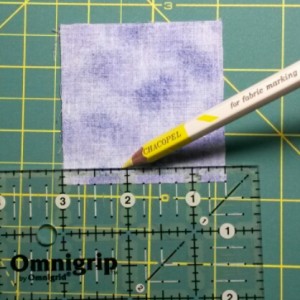
Note that this only works if you’re measuring with the seam allowance NOT underneath the ruler. If you’re measuring and marking from the seam allowance edge, your line will be slightly inside the true quarter inch, not outside like a scant quarter inch. Measuring like in the picture below and then sewing on the line will make your pieces too small once sewn together.
Now this is brilliant for squares and rectangles, but I can tell you’re asking, what about triangles, and other odd shapes where you can’t measure from the opposite side?
The trick in those situations is to measure from the seam allowance side with one ruler, then butt another ruler up against it as shown in the photo below.
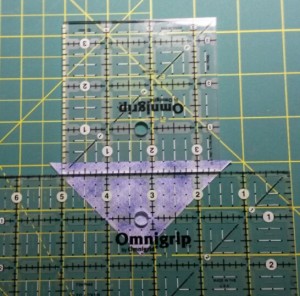
So, we’d measure 1/4 inch from the seam allowance side using the small ruler at the top, then butt the larger ruler right up against the smaller one. Once this is lined up, you can remove the smaller ruler, and draw your line as usual, flush against the remaining larger ruler.
And voila, you’ve got an already scant quarter inch seam marked, even on a triangle.
Just to be clear, I still re-measure periodically while constructing a block, to make sure I don’t need to adjust the drawn seam lines, but it’s nice to understand why the lines are consistently a little bit off, so I can account for that when sewing.
I’m sure MacGyver would be proud of me for using math and science to improve my quilting.