I stupidly started this triangle border assembly process with BR1 (the first triangle I did, and re-did, and re-did).
All I had to do was stitch a solid red triangle on each long side of that triangle block, and call it good. It should have been so easy, and yet the striped triangle required trimming, re-marking of lines, pinning multiple times …
And I still wasn’t sure it was going to all be lined up right. Definitely not the right block to start out assembling my first triangle border with.
The other triangles in the bottom row went a little better than that first one (it was a admittedly a pretty low bar), but it was certainly tricky to line up those triangle blocks just so. I ended up re-marking the outside stitching lines on the sides of every single pieced triangle in the row.
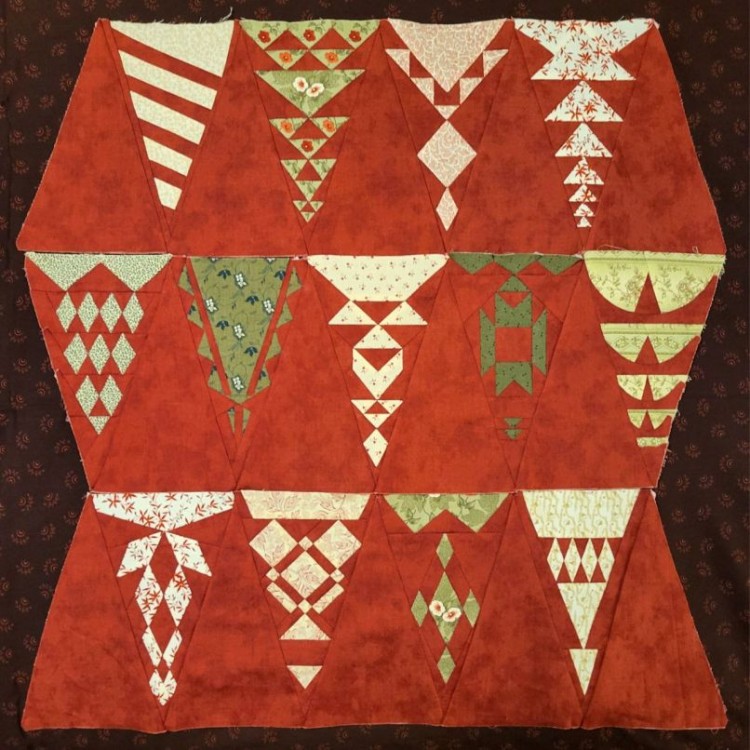
The good news is that I have completed an entire triangle row, and that means I’m already 25% done with assembling the borders.
I’m showing it here still in three sections, so that it fits in the photo better, but rest assured that those last two seams have since been sewn and it’s completely done.
Except that it might not done, because I haven’t stitched on that piece of sashing that goes between the triangles and the main body of the quilt. I’m thinking it would be easier to piece such a narrow sashing onto the relatively small row of triangles first, rather than trying to piece it onto the nearly 6’x6′ center section.
Looking at the outline drawing of the entire quilt, however, it seems like those narrow sashing strips were designed to be attached to the center section of the quilt rather than the triangle rows.
Since the sashing strip is not the same length as the triangle border, it might take a lot of fussing to get everything lined up just so. It might involve trimming, re-marking of lines, pinning multiple times …
Maybe it’s better to just wait and put it on the center section after all.