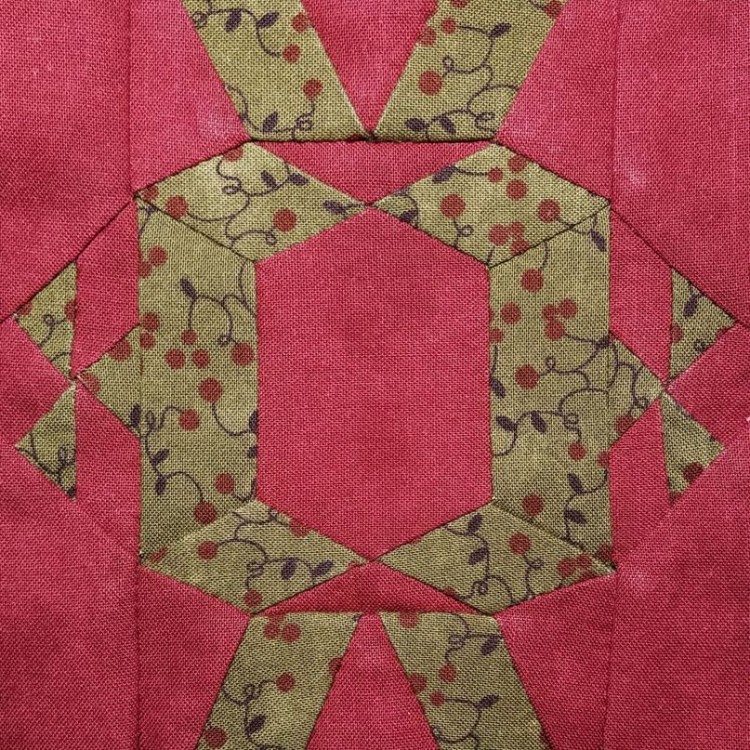
I’m not sure what this block pattern is supposed to be, but every time I look at it, I see a rabbit-shaped robot, so that’s what I’ve been calling it. Whatever it is, it’s definitely a complex block, so I looked at different ways to piece this online … and there were so many.
I discovered a new Dear Jane blog – Fabadashery – and liked what they did with this block, eliminating seams in a way that doesn’t end up with so many skinny pieces. They had three colors to my two, so I could eliminate even more seams – in my version of the block, I ended up with 35 pieces instead of the original pattern’s 45.
There are two ways to cut and mark the pieces for hand piecing: either cut out the shapes, then mark a stitching line 1/4″ in from the edge, or mark the stitching line and then cut out the shape 1/4″ outside the marked line. Usually I do the former, because I feel like it makes it easier to line everything up when stitching if the cutting line is also very precise.
In this case, however, I was redrafting so many pieces that it made sense to do it the other way around. This way I could just take a printout of the actual size block, mark my new stitching lines, and cut out the templates on those stitching lines. With this type of template, when I trace around the template, I’m marking the stitching line, not the cutting line.
Once the pieces were all marked and cut out, the assembly was something of a jigsaw puzzle. First, I attached the four diamonds and the skinny red triangles to the center shape:
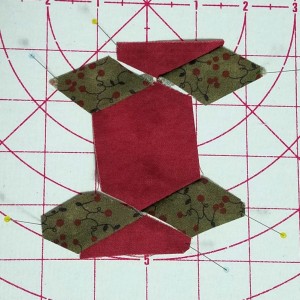
That center red shape was originally three pieces – a square and two skinny triangles – but skinny pieces are a pain in the butt, so I try to avoid them wherever possible. Since all three pieces were slated for the red fabric, I just cut it as one piece.
The second step was to inset the green trapezoids:
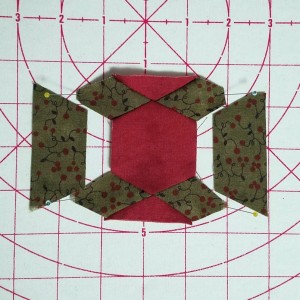
Again, each of those green trapezoids was originally supposed to be made up of three pieces – a triangle and two diamonds. Again, there was no point in having those extra seams when all the pieces were slated for the same green fabric.
The third step was to add the top and bottom sections (with the rabbit ears and legs):
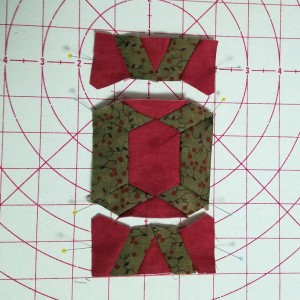
The red pieces to either side of the ears and legs were originally each made up of a trapezoid and a teeny tiny skinny triangle, but were easily combined into one piece. This particular seam elimination was what sold me on Fabadashery’s approach to this block.
At this point, I was finally done with inset seams. Then it was just a matter of assembling and attaching the panels on the left and right side (with the rabbit robot arms):
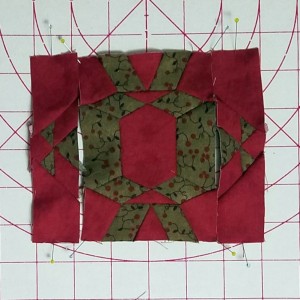
The big pattern change on the side panels was actually adding seams, rather than taking them away. In the original pattern, there was a suspicious lack of seams … it almost looked like the green triangles were appliquéd on. I’m not a fan of appliqué, so I opted to add extra seams to avoid it.
Technically, this block took 17 days to construct from start to finish, but don’t be intimidated by that timeframe. The problem was that I caught a bad cold immediately after starting the block, and was unable to look down for over a week without my nose running or me sneezing and blowing all my pattern pieces across the table. The actual time spent sewing this block was much shorter.
Once my cold settled down (sort of), I was able to make some progress in small chunks of time. At the doctor’s office, at my quilt guild’s board meeting, and fittingly, while watching my kid’s robotics team compete. Their mascot is a squirrel … not quite a rabbit, but close.
Here’s me working on the robot rabbit while watching the robot squirrel:
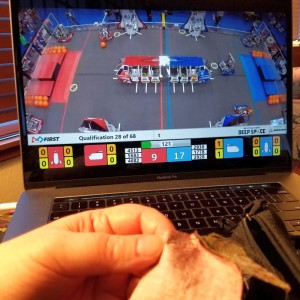
The robot squirrel won its competition and the robot rabbit is complete … a success all around!
Another great block and again a pleasure to read about your process to make it 🙂
Awww, thanks! I was really nervous about going “off-book” in the construction of this block, but hopefully my process will help the next person trying to figure out how to hand piece this one. 🙂