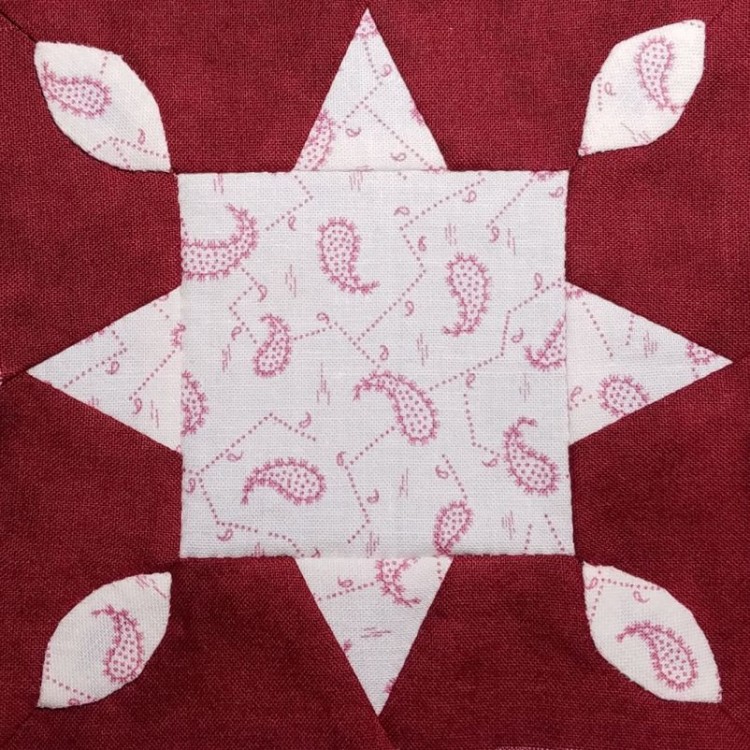
I’ve agreed to teach a half-day hand piecing class at my guild’s day camp in a couple of months. I’ve taught hand quilting before, and while that was somewhat nerve-wracking, at least I’d been hand quilting for more than a decade and felt like I knew my stuff. I’ve tried a lot of hand quilting techniques over the years in order to find what works best for me, and I can speak comfortably about other methods and why I don’t use them.
I haven’t done nearly as much hand piecing, and I’m 100% self-taught, so this upcoming class is providing me with a whole new level of anxiety. To combat that nervousness, I’m trying to accelerate the whole “trying other techniques” process and cram it all into a few weeks.
Naturally, I started by watching a bunch of YouTube videos to see how other people hand piece. I assembled a list of products and techniques that other hand piecers use, and then went shopping for the tools I wanted to try. They arrived in the mail a couple of days before I started this block, and I was excited to experiment with them all right away.
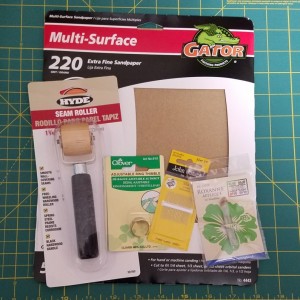
My first experiment was with sandpaper. I’d watched a video online where the person put a piece of fine (220 grit) sandpaper underneath the fabric pieces as they marked the stitching lines. The theory is that it holds the piece in place better and provides a somewhat softer marking surface, allowing you to get a darker, more accurate line.
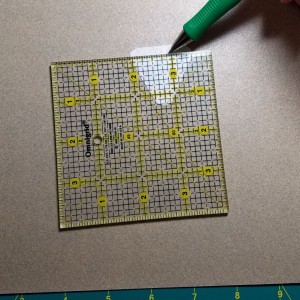
I was worried about the sandpaper abrading the fabric, so I tried it out on the white focus fabric, rather than potentially ruining a molecule of my precious and scarce red background fabric. After testing on a few pieces, I concluded that abrading the fabric was not going to be a problem. What was getting abraded were my fingernails every time I tried to pick up the ruler or the piece of fabric from the sandpaper. I walked around with scrapes on my fingernails for days.
Still, I toughed it out for most of the 17 pieces in the block, to give it a proper test. I quickly figured out that instead of picking up the piece to reposition it before marking each side, I could just turn the entire piece of sandpaper … that saved my fingernails a little bit. While the sandpaper helped somewhat to keep the marking pencil from tugging the fabric out of alignment, I’m not sure if it was enough of an improvement to offset the scraped up fingers. I don’t think this tool has earned a place in my sewing box.
Next up were the new needles. I’d been hand piecing with Roxanne between needles in size 10, because that’s what I use for hand quilting and I was too lazy to go out and buy a new set of needles. According to my research, most hand piecers use sharps (longer, thinner needles than the 1″ long “betweens” used for hand quilting).
It looked like Roxanne, John James, and Piecemakers were the most popular brands, but Piecemakers lost out because they weren’t available on Amazon Prime. So, I bought a package of John James sharps and a tube of Roxanne appliqué needles (I still am not sure what the difference between sharps and appliqué needles is … they seem to be about the same size to me).
I have used Roxanne needles for almost 20 years, and been extremely happy with them. So, I was surprised at the quality of their appliqué needles. The picture below shows the Roxanne needle with the white thread, and the John James needle with the red thread:
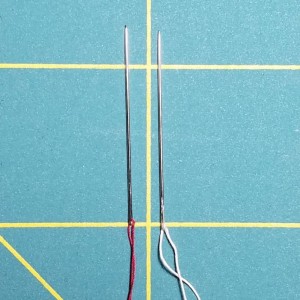
The Roxanne needle almost looks like it’s been whittled. It has scrapes all up and down the needle – not a smooth finish. I also found it really hard to thread: they claim their needles have the biggest eye on the market, but it was mostly just long, not very wide, and the scraped up surface did nothing to help the thread glide through the eye. I have never had any trouble with Roxanne between needles … maybe I just got a bad batch of their appliqué needles.
I had better luck with the John James sharps. While it took me a while to get used to the longer length (between needles are about 1/4″ shorter than sharps), it was definitely nice to have room to put more stitches on to the needle before pulling the thread through. It did feel very thick though; I may invest in a package of size 11 needles and see if I like them better.
My third experiment was with thimbles. I’d seen a video of Yoko Saito hand piecing, where she had a ring-shaped leather thimble on her bent middle finger and rested the blunt end of the needle against it while she stitched. Since I wear a groove into my middle finger from the blunt end of the needle when I hand piece a lot, this seemed like a good tool to add to my toolbox.
Amazon didn’t appear to have a leather ring thimble like I’d seen in videos, but I finally settled on an adjustable metal one from Clover (I really like their adjustable metal fingertip thimble for hand quilting). The price was certainly right, if it turned out to be a failed experiment. Here is a picture of me wearing the thimble:
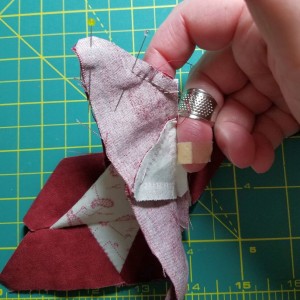
Note: I had a terrible time taking a photo of this tool in action … I couldn’t show my left hand in the act of piecing, because I needed it to hold the camera, and I couldn’t hold my right hand in the natural position for hand piecing, because then you wouldn’t be able to see the thimble. So, I’m not 100% sure this really demonstrates the technique. I recommend checking out the Yoko Saito video linked above for a better demonstration of the proper hand positioning.
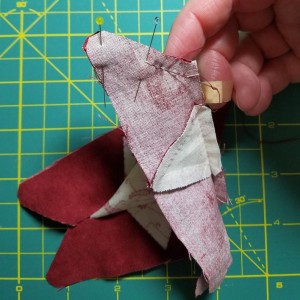
In practice, I couldn’t do the technique very well. Either my hands are too small or the new needles are too long, or a combo of the two. If I got the blunt end of the needle to rest in the dimples of the thimble, then the pointy end of the needle was way too far out there to control easily with my fingers. For now, I’ve gone back to my trusty old low-tech hand piecing “thimble” (a small bandaid on my middle finger where the needle normally rests):
The final tool I test drove was a pressing aid. I’d seen seam rollers in action many times, but never gotten around to purchasing one. I’m glad I finally did. Since hand piecers are often stitching on the go, they don’t always have an iron handy. This little roller is great for those situations:
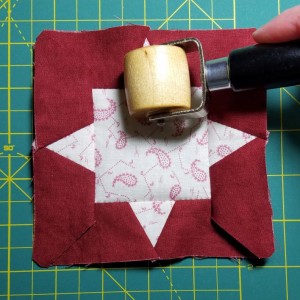
While it’s not quite portable enough for my tiniest travel kit, it works great at home when I don’t feel like firing up the iron, or at retreats or other quilting events where I don’t travel quite as light.
I was skeptical of the roller’s ability to actually press seams, but it was definitely the most successful of the tools I tried this month. This one will stay in my arsenal for sure, and probably the sharps will too, once I settle on the right size and brand. I haven’t quite given up on the ring thimble either, but the sandpaper has got to go.
Of course, I’d already found my all-time favorite hand piecing tool, but it’s good to try some shiny new tools from time to time. I’m already feeling better-prepared to teach my first hand piecing class in May.
I enjoyed reading your blog. My Dear Jane was machine pieced, but I am in the process of hand piecing a throw sized quilt. It is actually a quilt along of nine 6” square blocks, but I am making more with the intent of using them with solid squares in between. It has been a fun adventure and a nice technique to have in your arsenal.
Thanks, Brit! Are you doing the Hand Pieced Quilt Along from Elm Street Quilts? I’ve been following along but haven’t made any of the blocks yet … been too focused on my Dear Jane blocks. I really enjoy the portability and the meditative pace of hand piecing. 🙂
That is the one I am doing also.
Very interesting to read your experiments! I hand piece as well and haven’t discovered a difference in applique or sharps as well. I love them both for hand piecing though because they are long, super bendy and sharp. Somehow especially the bendy part makes piecing very easy for me.
How nice to be able to give a class as well. Good luck!
I think I like the sharps, but I definitely need to fine-tune the exact needles I use … those size 10 ones did not feel very bendy to me. I think I’m going to order a package of size 11 to try out. Do you have a preferred size and brand?
And thank you for the good luck wishes for the class. I’m super nervous about teaching, but hopefully it’ll be fun once it gets rolling. 🙂
I have tried many brands of needles including the one’s you mention above. I discovered Bohin applique size 11 needles, as I needle turn applique. Not only do I find them smooth but they work in the Clover desktop needle threader. If you get a chance, try them. I buy them at Fat Quarter Shop at 2.99 for a pack of 20 needles.
Thanks, Marguerite! I have used Bohin’s mechanical marking pencil, but didn’t even know they made needles. I’ll be sure to try them out.
I’m brand new to this group and intend to start my quilt when I’ve finished the English Patchwork quilt I’m presently working on.
I did however want to know are the blocks 4″ square finishes or 6″ square please on the Dear Jane quilts?
PAtricia UK.
Patricia, I think the standard finished size for the Dear Jane blocks is 4.5″ square (so 5″ square including the seam allowance), but if you have the Dear Jane software, it will allow you to print the blocks out in different sizes.
Good luck in your Dear Jane journey! 🙂