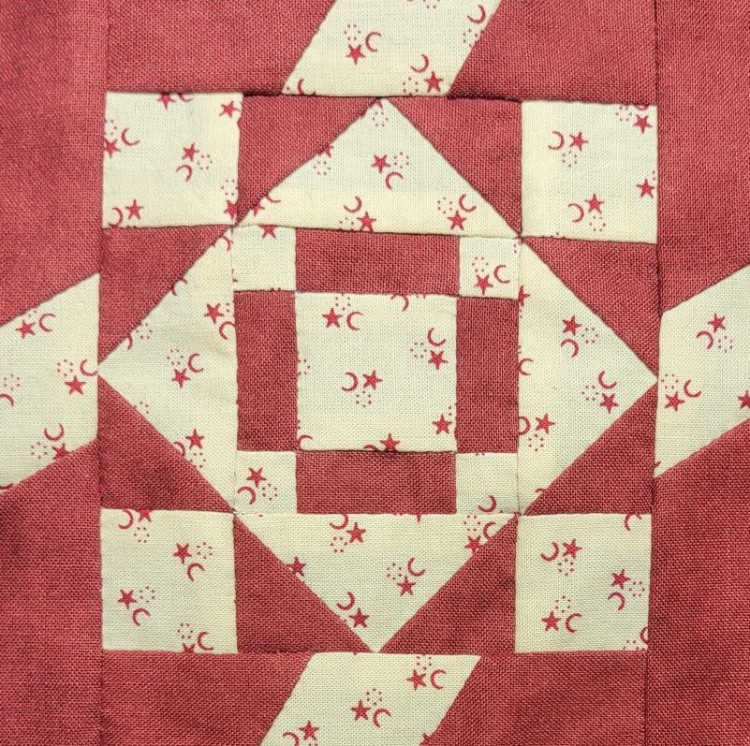
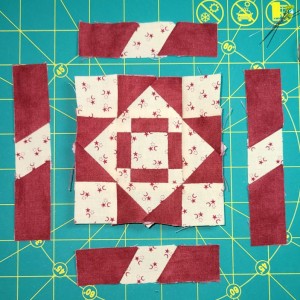
With the pandemic not as wound down as I’d like, our few vacations have been short trips to places within driving distance. So, in May, I ambitiously packed supplies for three blocks to work on during a 2-day weekend getaway to a nearby coastal town. Naturally, I didn’t get nearly as much stitching done as I’d hoped in that 48 hours, but I did cut out the pieces for this block and sew a few of them together.
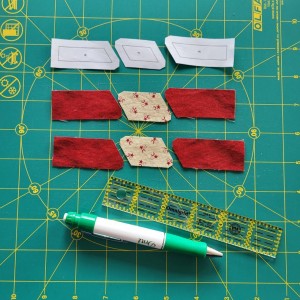
The really odd thing about this block were the diagonal pieces on the outer edges. The thing that was so odd about them is that the measurements given in the rotary cutting instructions were different than the measurements of the corresponding templates.
In the rotary cutting instructions, the length of the two red pieces on either side of the cream parallelogram are the same. In the templates, one of the red pieces was about 1/16″ longer than the other. I still don’t understand why the sizing was different in the Dear Jane software depending on the cutting method chosen.
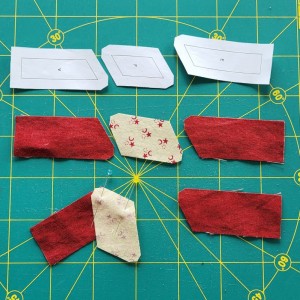
I ended up cutting the pieces out using the templates, since those pieces were bigger than the rotary cutting measurements, and I figured I could always trim later.
Since the pieces on either side of the cream parallelograms were different sizes, I was worried about getting them mixed up. So, I worked the block from the outside in, starting with the weird edge pieces. I figured that way, I would get them permanently sewn together before I lost track of which pieces went where.
Once I got them sewn together, I realized that the completed strips were indeed going to be too long. I really don’t understand why the software had different size pieces for their templates vs their rotary cutting directions, but the important thing was to end up with a finished block that is the correct size.
So, I centered the sewn-together strips under a ruler (and by centered, I mean so that the cream-colored piece in the middle was centered), then I marked the “excess” that the one longer pattern piece added to the block.
As I got further into the block assembly process, I finally got up the courage to just trim off that excess. Then I continued working my way in to the inner square of this block.
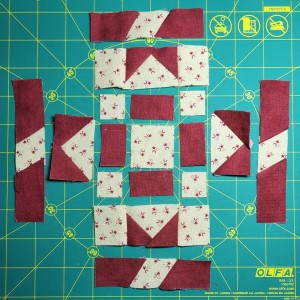
Once I’d sewn my way to the middle, I started working my way back out, adding rows onto each side until I got back out to that outer row with the diagonal pieces.
I had a moment of panic when my friend Marissa announced that some of the diagonal pieces were going the wrong way, but it turns out that’s just how the block is. It’s not supposed to be a pinwheel design. Crisis averted.
Even though it went against tradition to sew together a block starting from the outside edges, I’m glad I did it that way. It let me get a solution figured out for that outer layer right away, and then not have to worry about it while constructing the rest of the block.
My UFO Challenge was handled in the same methodical way. In addition to this block, I sewed together 2 other blocks, and completed 18 triangle motifs on the rainbow quilt:
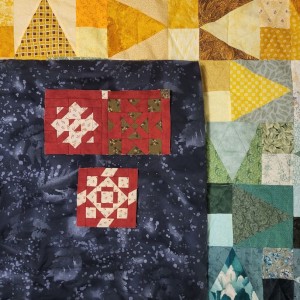
The big excitement there is that after months of green, blue, and a little yellow (since I’m quilting the rainbow quilt from the outside in), I have finally worked my way out to the orange part of the quilt. In June I’ll be breaking out the orange thread for the first time!
Oh that Marisa, always ready to start a panic! Heh. This one looks complicated and came out great.
She does have a point though; most of us would expect those parallelograms to be arranged like a pinwheel. 🙂