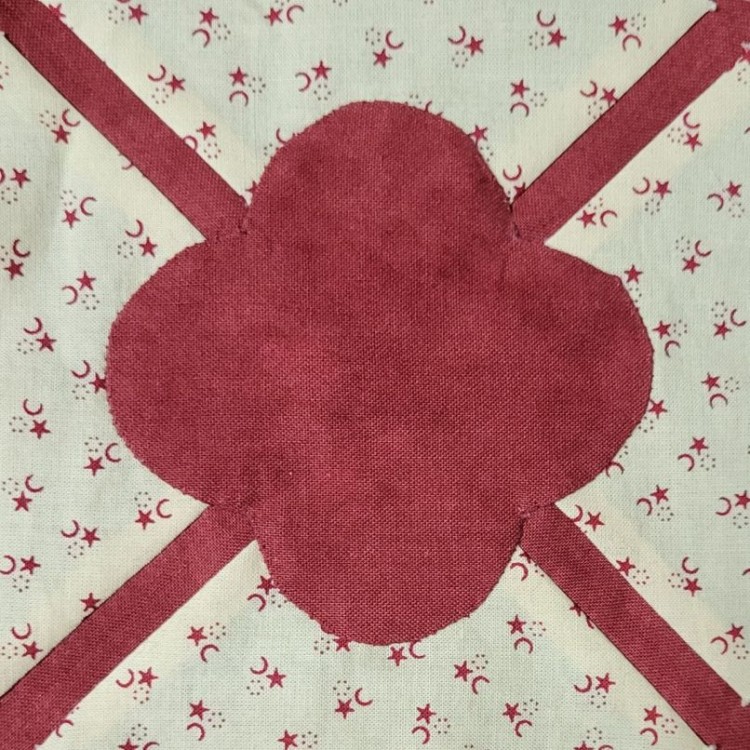
Perhaps the giant cloud in the middle of this block should have been an omen, but I ignored it.
The Dear Jane blogs I consulted all said to use appliqué, but the templates given in the Dear Jane software were for curved piecing. I dislike appliqué and curved piecing equally (or so I thought), so laziness won out and I decided to use the templates from the software, since they already existed.
A few of the bloggers gave dimensions for assembling the “background block” and then appliquéing on the cloud piece in the middle, but they were really focused on machine piecing, where you could just cut off the excess fabric after assembling in order to make it the right size. Hand piecing is predicated on cutting the piece to the right size from the beginning.
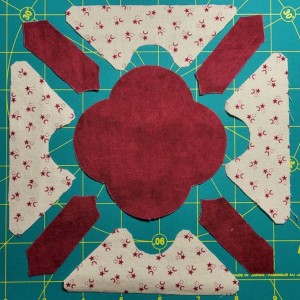
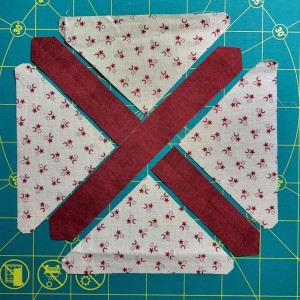
So, I forged ahead with curved piecing. I cut out the pieces with reasonable precision, marked the seam lines, and sewed all the outer pieces together into a ring. All that remained was to sew around the four curves of the center piece.
I started at one of the little indents on the central shape, and by the time I passed the second indent, I could see it was probably a lost cause, but I kept going for a little while longer, just in case it magically improved. It did not.
I think the problem is that the indent is nestled in between two seams that you are crossing over. There’s just too much going on in a 3/8″ space, and it was impossible to place a stitch in just the spot you want, going through just the layers you want.
After a week of this, I made the decision to scrap the curved piecing attempt and appliqué the block instead. But that red fabric is at a premium and I didn’t want to waste that center shape, so I very carefully picked out all the stitching I had done on the curved seam.
Anybody who tells you that hand piecing stitches are not as secure as machine piecing stitches is a liar. Plus in an attempt to wrestle these curves into submission, I had decided to backstitch every four stitches instead of every six. And of course some of those curves were on the bias and I had to be careful not to stretch the piece of fabric I wanted to reuse. I think it took me longer to pick out the stitches than it did to sew them in the first place. But I ended up with a reusable (if a little bit rough around the edges) center motif.
The next goal was to figure out exactly what size to cut the pieces in order to piece the block that the center motif would be appliquéd on to. For this, I printed out the finished block outline and extended the red strips so they went all the way across the block.
Then I used one of my favorite quilting books of all time, “Rotary Magic” by Nancy Johnson-Srebro, to determine what size pieces I needed to cut out to make this X-shaped block by hand. I strongly recommend you get your hands on a copy of this book if you do any kind of modification/resizing to quilt patterns.
I measured the finished dimensions of the triangles, and looked up the amount to add for seam allowance in Johnson-Srebro’s book. I needed to cut a 5-1/4″ square and cut that into four triangles.
Then I measured the finished dimensions of the two shorter strips and one longer strip that I would need to make the X. The shorter strips have a point on only one end (what Johnson-Srebro calls a single prism), so I needed to cut out two strips that are 3-5/8″ x 7/8″. For the longer strip (what Johnson-Srebro calls a double prism), I needed to cut out one strip that is 7-1/8″ x 7/8″.
Armed with these measurements, I cut out the pieces, and trimmed the end(s) of the various strips at a 45 degree angle from the center of the strip.
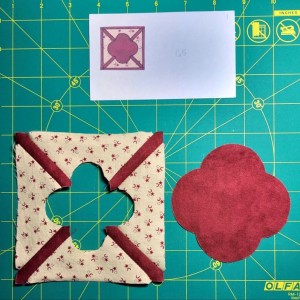
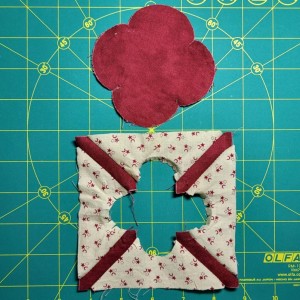
Piecing the underlying block was simple, and appliquéing the center motif, while not my favorite, ended up being much simpler than my initial curved piecing attempt.
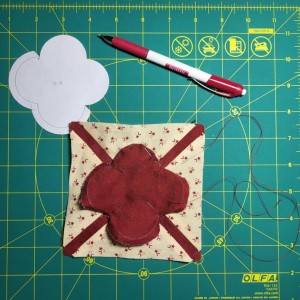
I opted not to trim the excess fabric from behind the appliquéd motif, since that would cut through my stitching lines and potentially leave me open to unraveling.
The finished block still looks kind of sad, in my opinion, but not sad enough to entice me to redo it. The block literally has a cloud hanging over it, and I want to be done with it.
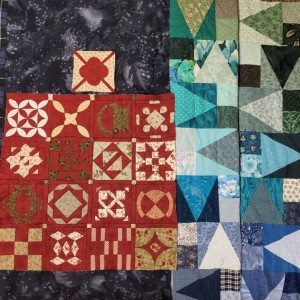
At least my one super-pitiful Dear Jane effort (the G5 block) is completely overshadowed by my other super-awesome Dear Jane effort in August (the 4×4 grid of sashed together blocks). In addition to those two projects, I quilted 18 triangle motifs on the rainbow quilt to meet my August UFO Challenge goal:
Next I’m doing a block with absolutely zero curved lines, in an attempt to banish these clouds (both literal and figurative) from my quilt and make some sunny sewing progress!
I feel your pain. I had looked at this quilt a long time and thought I would never do it because of the applique. Turned applique rarely looks good to me and mine surely never look smooth. But I liked the idea of doing the quilt and I said HAH. Jane didn’t have all the modern stuff we have like machines, rotary cutters, beautiful colors, rulers and fusibles. So, I am paperpiecing the blocks and doing fused applique, sewing the edges with the machine feather stitch. I like the flatness and smoothness of the result.. I think it looks clean and modern with my high contrast colors and white background fabric. Do your thing and enjoy the result, regardless of technique you use. I just finished the last corner piece today. I am gonna take a break for awhile and do something else. Happy piecing!
Congratulations on finishing that last corner block, Shirley! I think you’re right, that the key to success on this quilt is to find techniques for doing it that work for you. 🙂