This is another one of those blocks where there are as many possible construction methods as there are quilters.
The Dear Jane software has you making the four quadrants of the block separately and then sewing them all together (which means the center square is actually made up of four tiny triangles). There is not a lot of insight on how to construct those four quadrants though.
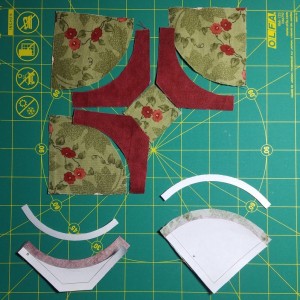
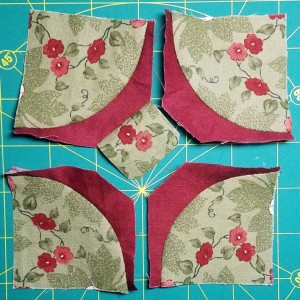
Many appliquéd the quarter circles on to background squares (one source even suggested appliquéing a larger circle on to a larger square, then cutting it in quarters and rotating those pieces). I considered appliqué, but decided I didn’t want to waste that much red fabric underneath the appliquéd green pieces. So I opted for curved piecing instead.
I used my new technique for marking the stitching lines on the curved parts, and it went together pretty smoothly.
The other aspect of the pattern is that center square. Most of the other quilters I consulted added a triangle to each quadrant and then sewed the quadrants together to make the final block … but I was unenthusiastic about adding all that seam allowance bulk right in the center of the block.
I looked at photos of the original block made by Jane Stickle for guidance/inspiration. The center square seems much larger on her version, and it was hard to tell whether her center square was actually four pieces or not.
So, I don’t know if my approach is historically accurate or not, but this seemed like one of those times where I should march to the beat of my own drummer and simplify the pattern. And it was definitely nice to simplify a pattern, after complicating the pattern for my latest triangle.
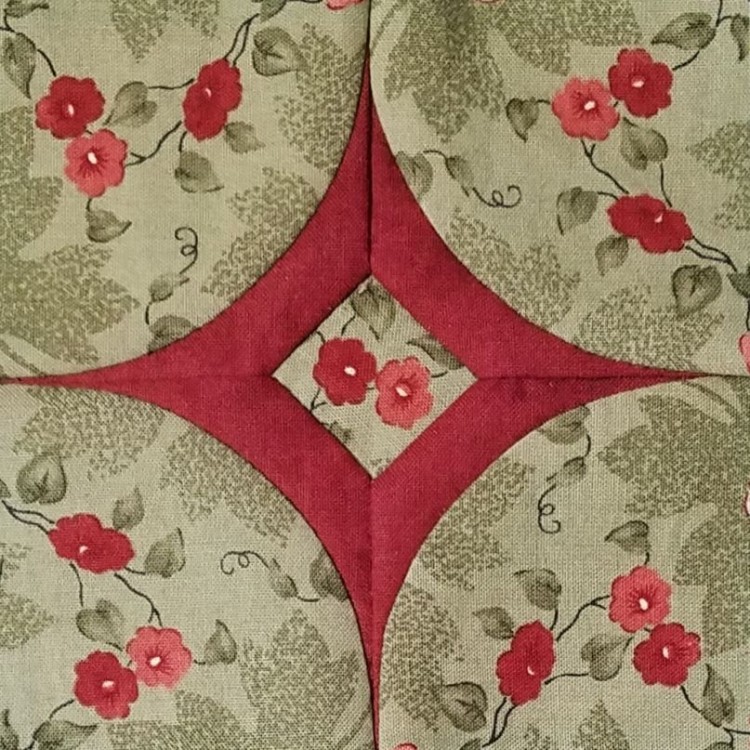
I’m pleased with the result on this block. I reduced seam allowance bulk by making the center square a single piece, and the set-in seams were no big deal since I’m hand piecing.
As a bonus, I was able to fussy cut some flowers for that center square, which I would not have been able to do if it had seams running through it. I also fussy cut the same set of 3 flowers for each quarter circle.
Now that I’ve got all the blocks done for the lower right quadrant of the quilt …. hmmm, I guess they’re not really quadrants if there are nine of them. Maybe they’re “nonants”?
At any rate, now that I’ve gotten all the blocks in the lower right corner (blocks J10 through M13) done, I am planning to start sewing the blocks to each other. This will be part of my 2022 UFO Challenge.
My official monthly goal for 2022 is as follows (you heard it here first):
- complete 1 Dear Jane block
- add sashing and cornerstones to 2 Dear Jane blocks and sew them to each other
- quilt 18 triangle motifs on the rainbow quilt
Here are the results of my January 2022 UFO Challenge:
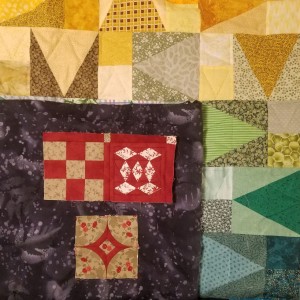
I completed one Dear Jane block, sewed 2 Dear Jane blocks together with sashing (more on that in my next post), and completed 18 triangle motifs on the rainbow quilt, breaking out the yellow thread for the first time. Of course I met my January goal, since I based the goal off of how much I got done in January!
With the holly wholecloth quilt all done, I’m stepping up my rainbow quilt efforts in hopes to have this high school graduation present done before college graduation. I toyed with increasing the Dear Jane goal to 2 blocks per month, but instead opted for a new goal to make some progress on assembling the quilt top. It gives me a sense of accomplishment to see it starting to turn into a real quilt.
Plus if I intermingle these boring sashing seams with the block construction, I won’t get stuck with doing tons of repetitive sashing at the end. By autumn, I should have that lower right quadrant (nonant) all sewn together.
Nice job!!
Thanks! I’m pretty pleased with it. 🙂
This is an especially nice block. Very graceful! I’m thrilled to see some sashing bringing the blocks together into nonants- and to have a new vocabulary word too!
I’m super excited about starting to assemble the blocks too.
But full disclosure: I don’t think nonants is a real word! 🙂