I had originally planned to do block C10 – something that is for me relatively simple – after the trauma of block G6. I even went so far as to pull out the fabrics I’d need, print out the pattern pieces, and pack them in my suitcase when we went to see my Mom at Christmastime.
But then I didn’t even take them out of my luggage. And by the time the holidays were over, I was recovered from the G6 block (which turned out to be not that bad), and I had received new appliqué pins for Christmas that I was itching to use on some curved piecing to see if they worked better.
So, I scrapped my plans to work on C10 and went for the curved piecing opportunities offered by H8 instead. Once again, I pulled out the fabrics I’d need, printed out the pattern pieces, and I was ready to go.
But I got busy with other things and before I knew it, a week of January had gone by and I hadn’t even started either block. I considered going back to the C10 block on the theory that it would be simpler, but just couldn’t make up my mind.
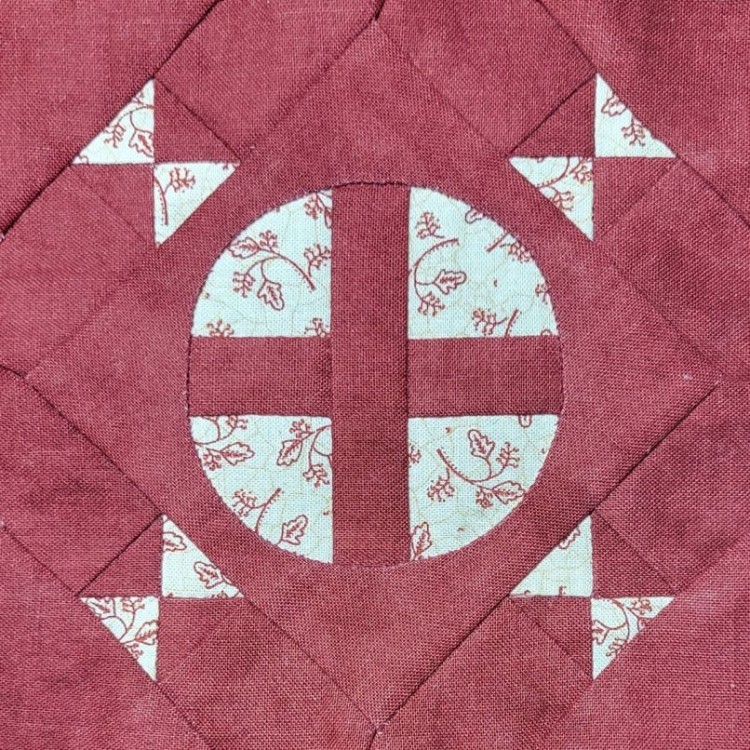
I ended up taking a poll of friends and family, and they chose H8 for me (in part because I’d spent the weekend replacing our bathroom fan and this block pattern gave off oscillating fan vibes). Luckily, I already had the pattern pieces printed out.
The construction process did not go the way I thought it would. Instead of curved piecing, I decided to reverse appliqué the circular “frame” around the plus shape. Unfortunately, the pattern pieces offered by the Dear Jane software did not support my chosen method, so I had to make my own.
Since that center circle is supposed to be 2-1/2” finished, I knew I needed a 3” circle with a plus in the center. I opted to make it a 3” square instead, and then trim off the corners later. I cut out four 1-1/2” squares of the cream fabric, two 1-1/2” x 1” pieces of the red, and one 3” x 1” piece of the red. I assembled these into a square with a red plus in the middle:
That part was pretty easy once I figured out the piece dimensions, but the red “frame” that went around the plus sign was a little tricker. The square part of the frame was 3-5/8” x 3-5/8” with seam allowance, so I cut that out, but no pattern was given for cutting out the circle in the middle.
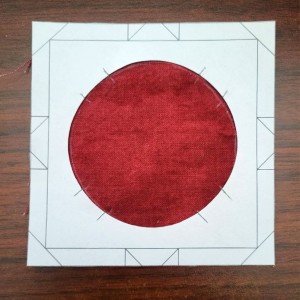
My approach was to print out an outline drawing of the block, draw a 1/4” seam allowance around the square on that printout, and extend the lines from the “plus sign” in the middle beyond the center circle. Then I cut the circle out of the center of my paper square, and voila! I had my pattern piece:
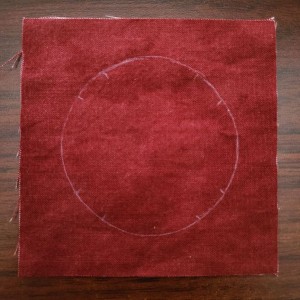
I placed the pattern piece over the red square I cut out earlier, and marked with chalk around the edge of the circle (my stitching line). I also extended the plus sign marks I made on the pattern onto the red fabric, so I had marks showing where to place each prong of the plus sign:
Once these marks were made, I eyeballed a 1/4” seam allowance inside that drawn circle and cut away the excess fabric in the center. I placed the red frame on top of the center square I’d made, lining up the marks with the prongs of the plus sign. Now I was ready to appliqué:
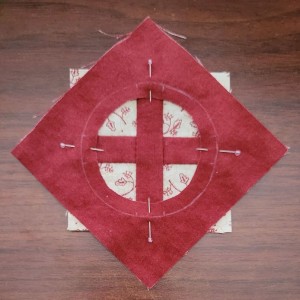
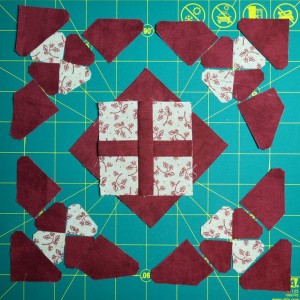
I reverse appliquéd the two pieces together (with the aid of my awesome new appliqué pins), trimmed off the excess seam allowance from that center section behind the scenes, then pieced together the comparatively simple corner sections.
My many fans know that my 2022 UFO Challenge consisted of finishing 1 Dear Jane block, sashing 2 more together, and quilting 18 motifs on the rainbow quilt each month. I’ve decided to continue the same monthly goals for 2023. And I met the goal in January too:
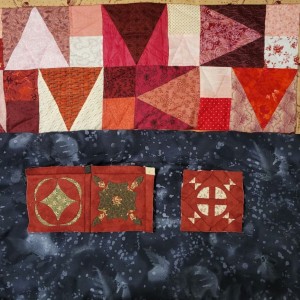
2023 is off to a great start!
Awesome, you do such beautiful work. Happy piecing!
Awww, thanks, Dawne!
Do you have engineer blood? I’ll refer to your post when I get to this block.
Well, I do work in the software industry, so I’ve got that kind of analytical brain. 🙂
In all seriousness, though, I’m so pleased that you want to use my instructions as a reference – that is my hope with this blog, that I can pay it forward to future Dear Jane piecers.