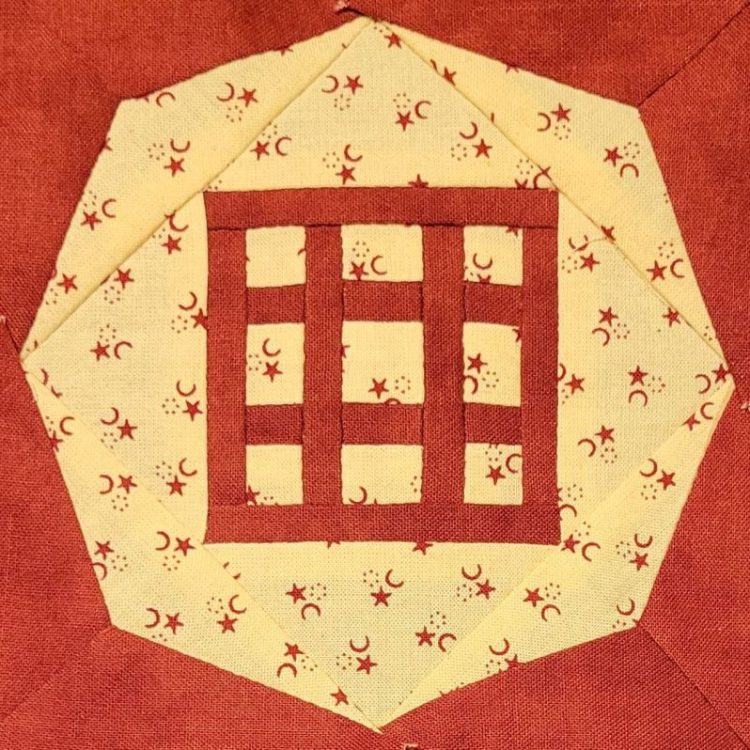
This block contained so many techniques that have historically been troublesome: tiny pieces, diamond-in-a-square segments, and y-seams.
Working from the center out, the first troublesome technique was tiny pieces. That center segment had squares as small as 3/8″ finished size, and the strips between them were only 1/4″ wide once finished.
Here you can see the center segment in progress, with a penny for scale:

I’m getting pretty used to working small, and the stitching didn’t go too badly with this center segment. The real problem here is that when those finished strips are 1/4″ wide, the 1/4″ seam allowance on the back really doesn’t have anywhere to go.
This one is going to be terrible to press flat, not to mention impossible to hand quilt through. It gave me flashbacks to some of my earlier Dear Jane blocks with narrow strips.
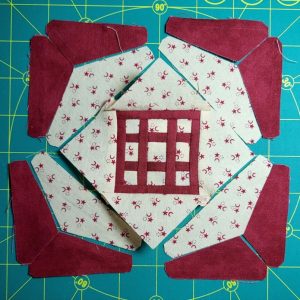
Once the center segment was completed, the next troublesome technique was my nemesis: the diamond-in-a-square. In this case, it was actually a square-in-a-diamond-in-a-square.
The next step was to attach triangles to the super-thick center square in order to make a diamond. That didn’t go as badly as I feared, since both sides of those seams were on the straight of grain:
Stitching the pieced corners onto that diamond unit – where both sides of each seam were on the bias – was decidedly less fun.
But before I could even get to that less-fun task, I had to contend with a third troublesome technique: y-seams for those pieced corners.
Thankfully, y-seams are easier when piecing by hand, so this ended up being the least troublesome of the three techniques.
With three triangles coming together to make one larger triangle, the goal was to leave the shallowest angle at the end for insetting. This meant stitching the two outer red triangle pieces together and then insetting the very shallow cream triangle:
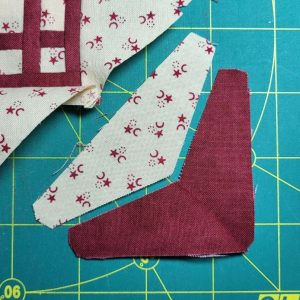
As usual with inset seams, it feels impossible when you’ve got the first part pinned on that the second part is ever going to bend around to where you need it, but somehow it always does.
With all these troublesome techniques in play on this block, it looked kind of off kilter at the end, but once I started to attach the sashing strips to it, it began to fall into line.
This is my last advanced difficulty block, so hopefully I’ve also seen the last of the troublesome techniques. On to the next (with luck, trouble-free) block!
You’re definitely a glutton for punishment!
I cannot disagree with this, Hope. 🙂