Ah, the holidays! That time of year where none of one’s regular activities seem to get done. Case in point: this block, which I embarrassingly started cutting out pieces for on Thanksgiving weekend, and am just now wrapping up in the week between Christmas and New Year’s.
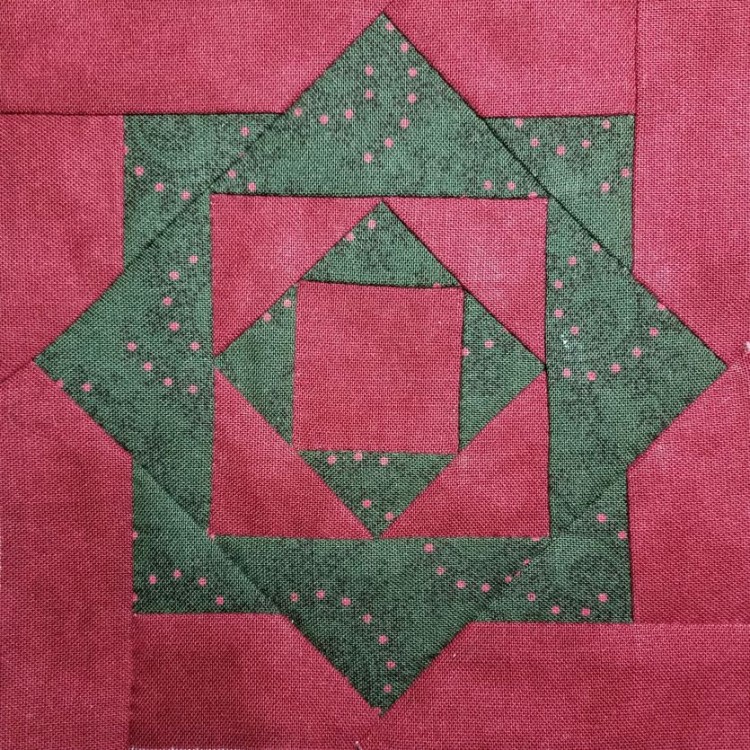
When I first saw this block, I thought it looked like some sort of portal to another dimension of time or space … and that kind of sums up the construction process for it. I don’t know where the month went, so I’m just assuming it was sucked into the time portal depicted in this block.
While the design looks complicated (time travel devices usually are), it’s really just sewing four triangles on the four sides of a square, and then repeating that process four more times.
The only real trouble I ran into with this block was with marking my stitching lines. I’m not sure if I’ve mentioned my favorite hand piecing tool before, but it’s so awesome that it’s worth mentioning again: The Deluxe Corner Trimmer & Hand Piecing Aid from Marti Michell. Here’s a picture of it in action:
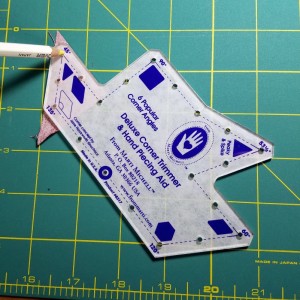
The idea is to be able to draw stitching lines that are exactly 1/4 inch from the edge of the shape, even if it’s an odd shape like a triangle, hexagon, trapezoid, etc. To use the tool, you line up your fabric shape under the appropriate corner of the tool. In the photo above, I’ve lined up one of the pointy sides of a right triangle with the 45 degree mark on the tool. Then you poke your pencil down through the hole at that corner, in order to make a mark that is exactly 1/4 ” from both sides of that point – no eyeballing or guesswork required.
While you’ve got the triangle lined up with the tool, you can also trim off the tip of the triangle point along the edges of the tool – this reduces all that unneeded fabric bulk at the point, and somehow also makes it easier to line up with other pieces that have been trimmed in the same way. I’m no geometry expert, so I don’t really understand why it makes it easier, but I’m willing to benefit from the magic of geometry if I can.
Once you’ve marked each of the corners, you just draw lines connecting the dots along each side, and voila! You’re ready to stitch accurate seams.
The problem I ran into with this block was because of the dark green fabric I used. Normally, with a dark green fabric, I would make the marks with my pink chalk marking pencil, which would show up nicely against that color. However, the red dots on the front of this particular fabric look like pink dots on the backside of the fabric, and I was having trouble figuring out which were my pink dots and which were the fabric’s pink dots.
I tried yellow and blue chalk pencils, and neither showed up as well as the pink would have … but it was enough to get me through with reasonably accurate seams.
It’s possible that the marking issues explain my lack of enthusiasm for finishing this block for over a month. I made some good progress in mid-December while I was waiting for a tardy travel coach driver in Canada (yeah, that’s right, this block is international!), but I was still only about halfway done by the time I got home from all my holiday travel.
So, I did the only thing that made sense when faced with a rip in the space-time continuum preventing one from finishing a quilting block: I queued up the Back to the Future trilogy on my TV and got to work. By the time Marty McFly got back to 1985, the block was complete. And now that the holidays are nearly over, hopefully my timeline will settle down and I’ll be able to get Back to the Quilting again.