Bonnie Hunter visited my quilt guild to give a lecture earlier this week. You can read all about the visit in her blog: https://quiltville.blogspot.com/2018/05/on-wings-to-washington.html
I’d been looking forward to her lecture for months. She appreciates the same kind of quilts I do: traditional, complex, and scrappy.
Before the lecture, I’d posted something to my Facebook feed about how excited I was to see her speak, and calling her the James Hetfield of scrap quilting (for those that aren’t up to speed on heavy metal music icons, he’s the lead singer of Metallica). Both Bonnie Hunter and James Hetfield are pioneer rock stars within their own niches of their respective industries.
I totally meant it as a compliment, but I was sweating bullets when I found out that my friend Dianna had shown Bonnie Hunter my post. Turns out there was nothing to worry about though – she took it well and was even reported to have found it amusing.
Since I was going to be sitting in an hour-long quilt guild business meeting prior to the lecture, I wanted to be sure to have a block ready to work on during the meeting. I focused on cutting out and marking all the pieces so I’d be ready to sew on Tuesday.
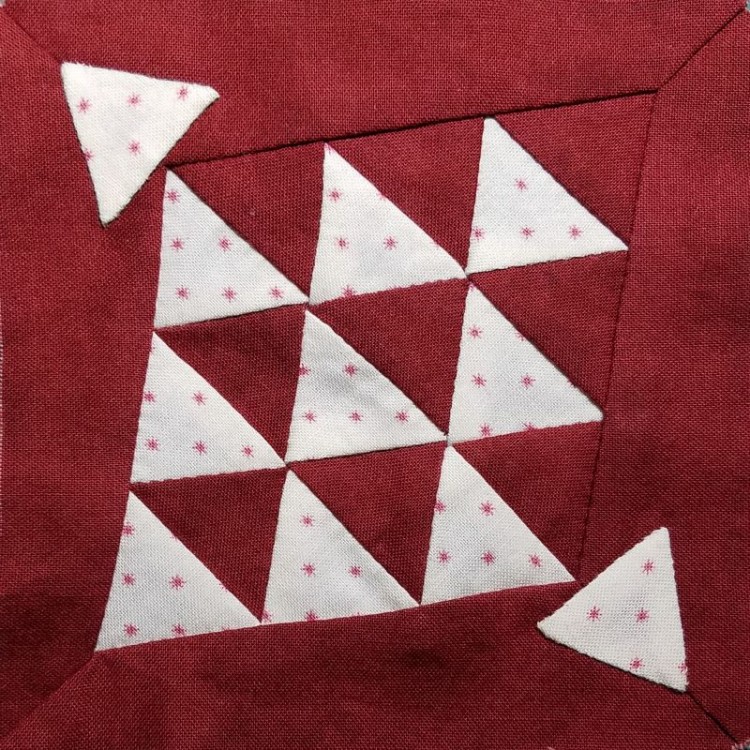
This block was my first experience with isoceles triangles. Cutting out the triangles didn’t go too badly. I cut out a strip of each fabric that was the right width and then placed the pattern on the strip, lined up my ruler directly on top of the pattern piece, and cut with a rotary cutter. My hope was that this would give me more accurate cuts than tracing around the triangle pattern with a pencil and cutting out the shape with scissors.
The eighteen triangles in the center of the block each had two 54 degree angles and one 72 degree angle. The tool I use to mark the stitching lines has a lot of angles, but 54 and 72 were not among them. I tore apart my quilting nook looking for a similar tool I had found at an estate sale a couple of years ago, remembering that it had more angles than the one I usually use. Once I finally found it, I discovered that while it had more angles, none of them were the two I wanted.
So, I ended up just marking 1/4″ from the edge on all three sides, and hoping that I had cut accurately enough. It turns out I had, and the triangle parts in the center of the block went together pretty smoothly.
I took my partly-finished block to the quilt guild meeting. This is one of my favorite parts about guild business meetings: I don’t have to look, just listen, so I can get a lot of stitching done while the meeting is going on. I made great progress, and would have even finished the block … except I had forgotten to pack white thread for those two triangles that were appliquéd on. With appliqué, the thread color is supposed to match the color of the piece you are attaching.
It was just as well that I couldn’t make any more progress on the block at the meeting, since that meant I could look up during Bonnie Hunter’s lecture and check out all her awesome quilts. I was totally fangirling. I even bought one of her books after the lecture and had her sign it, like I was some kind of scrap quilt groupie.
Once I got my hands on some white thread, I wrapped up the two appliqué pieces on the block. They were a little bit tricky to attach, because both pieces were appliquéd over the top of another seam. I felt like I needed an extra hand to hold that seam allowance out of the way while I was stitching, along with the seam allowance from the other triangles.
Speaking of the seam allowance from the other triangles: there was soooooo much of it. The intersections of those triangles have six different pieces of fabric coming together at one spot, and the bulk of six sets of seam allowance is nothing to sneeze at. I’d heard about a technique where you sort of pinwheel the seam allowances to help it lie flatter, so I tried it out:
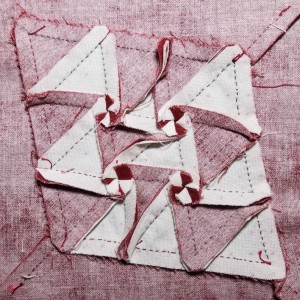
This is just one more benefit of hand piecing – you can’t do this pinwheel seam allowance technique with machine sewn seams. While they’re still a little bulky, and I couldn’t figure out how to get the twist out of that one center seam, it’s definitely better than not pinwheeling at all.
It was really interesting to hear Bonnie Hunter’s lecture. Some speakers just show their quilts, but she provided tons of useful tips and techniques in addition to the quilting eye candy. Her quilting methods are all about organization and efficiency techniques, allowing you to cut and sew the pieces in a kind of patchwork production line … whereas I’m more about one-off techniques and fussy cutting and slow piecing.
However different our approaches might be, the end result is the same: beautiful quilts that are traditional, complex, and scrappy.
That is a beautiful piece. Very triangly! That probably isn’t a word, but it should be.
Thanks, Wendy! I was nervous about all the triangles, but I think it came out pretty great.
And one of the best perks of writing a blog is that you can make up words whenever you need, so I hereby pronounce “triangly” to be a word. 🙂