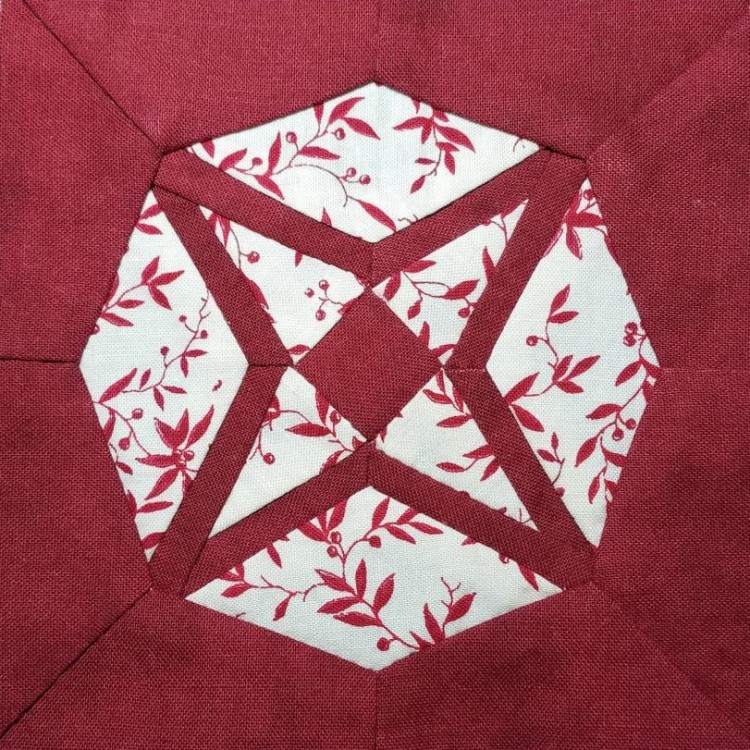
On my version of this block, all the red outline stripes are constructed the same way, with the outline on the right side of the triangle overlapping the outline on the left side of the triangle. On the original quilt, one of the outlines goes the opposite direction, and that irregularity is reflected in the pattern for this block.
I don’t really understand why quilters would copy the original block to the extent of including design elements that appear to be mistakes. I’m a big fan of symmetry, so I opted to “correct” that one outline that was facing the wrong way when cutting out the pieces for my block.
After the #monthofstitches last month, I’m pleased to get back to my regular routine again, where I cut out all the pieces, then mark them, and finally stitch them. This assembly line style of working allows me to take more pictures of the process for the benefit of you, my faithful readers.
I may have overdone it on the pictures, but this block went together in a complicated way, so I think it’s nice to see what it’s supposed to look like at each stage.
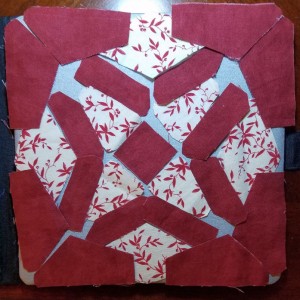
This time, I was very happy to be able to cut out and mark all the pieces prior to starting the stitching:
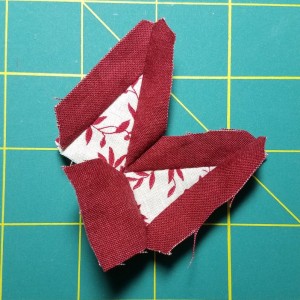
The first step of construction was to sew those narrow red strips (all oriented the same way, thankfully!) onto the adjacent white triangles:
Next, I attached the triangle units to the red center square. Each white triangle gets sewn to the square, and then a tiny seam (two stitches) attaches the red outline strip to the one on the adjacent triangle:
Once those triangle units were attached, I weighed my options. Should I sew the white diamonds to the center star or to the red pieces at the sides of the block first?
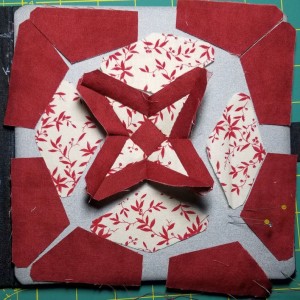
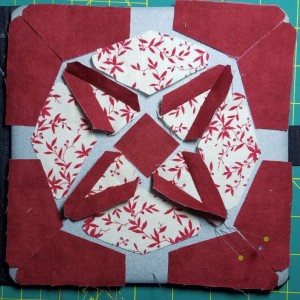
Once I looked at the diagram of the block, I realized that the edges of the white diamonds didn’t line up with the edges of the red pieces on the sides of the block. There was really only one construction option – insetting the white diamonds into the center star first – so that’s what I did:
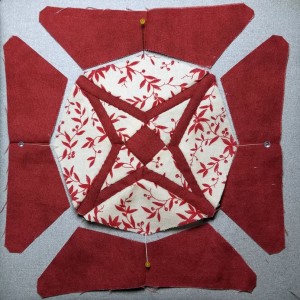
From there, it was easy to assemble the red side pieces and attach them to the center unit.
For all the time I spent thinking about how to construct it, I zipped right through the stitching … and then procrastinated for an entire week about writing the blog article. As I type this, I’m over half done with the next block already.
Normally I try to at least start writing before I begin the next block, but this time I needed to have the next one ready to work on right away – in the space of a week, I had four doctor appointments, a hand quilting group meeting, and a robotics team banquet. All were great opportunities to fit in some stitching (in fact, I noticed one of the other robotics parents was working on a craft project during the banquet too), and I hate to waste any stitching opportunities.
That having been said, I feel like the regularity of my routine is what keeps me making steady quilt progress … so I’m wrapping up this article right now and getting back to my regularly-scheduled assembly line.