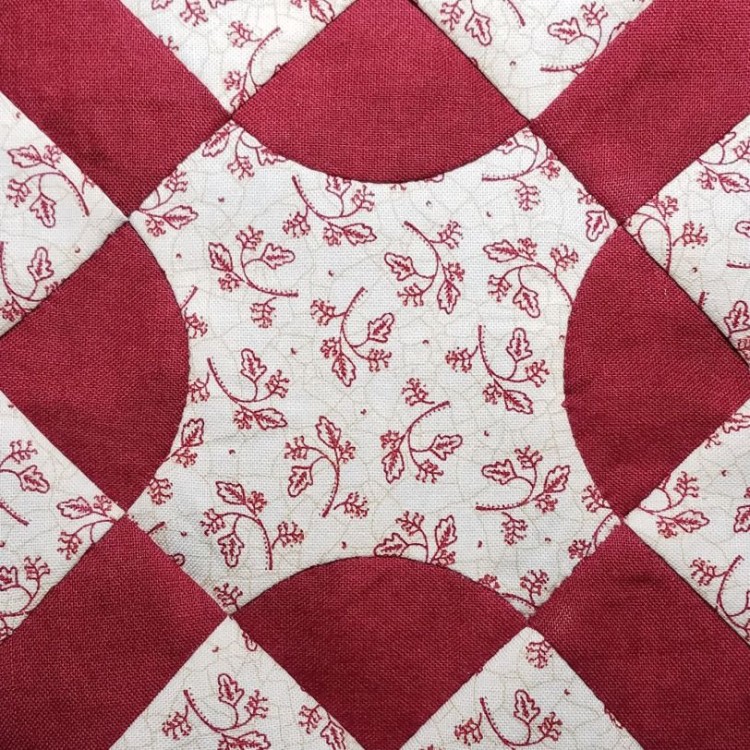
All my usual sources indicated that this block should be constructed with appliqué. Some suggested appliquéing the rounded pie shapes onto the cream fabric, and some suggested appliquéing the cream X onto the red fabric … but every last resource I consulted recommended appliqué. So, naturally, I pieced it.
Once I’d decided on my rebellious construction approach, the block went together very quickly – so quickly that I didn’t even take any photos of the block in progress. The bulk of the block was finished at my hand quilting group this weekend (a 3-hour respite I needed so badly that they had to chase us out of the community room a few minutes past the end of our scheduled time).
The block construction was fairly straightforward: sew the rounded red pie shapes onto the cream X, then sew cream triangles to the red corner pieces to create larger corner units, and attach those units to the center section.
Curved piecing can be tricky, but luckily these curves were much bigger than the ones I was wrestling with in May. You do have to snip into the seam allowance at regular intervals on the concave piece, so that it has enough give to bend around the convex piece, but then you just stitch as usual, stopping before you sew into the seam allowance. Once you’re done, those snips allow everything to magically lie flat.
When I was teaching a hand piecing class a couple of months ago, one of the students was adamant that you should sew all the way into the seam allowance on curved pieces. I said it was a good idea to not sew through the seam allowance, because that gave you more flexibility as far as which way to press the seams when the block was finished. She insisted that nobody would ever press the seams towards the convex piece, so there was no need for flexibility.
I didn’t really understand what she hoped to gain by sewing it that way, but I let it go for the sake of peace in the classroom. Now, two months later, I found that there were curved seam intersections on this block that looked much better from the front when I pressed towards the convex piece. So, naturally, I rebelliously pressed some of the seams the “wrong” way. This photo of the back shows how wild and crazy I am, pressing seams every which way:
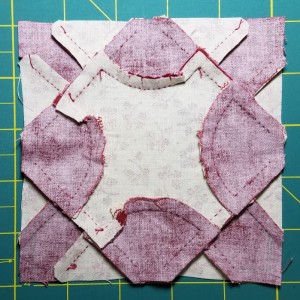
You can see the snips into the seam allowance on the curved seam at the top of the block. With each curved seam pressed a different way, it looks chaotic on the back, but from the front, everything lines up nicely. I’m breaking all the rules, but I think my little rebellions are resulting in better-looking blocks.