
I took this bit of sashing on vacation with me, because it doesn’t take nearly as much prep as a block does when I’m scrambling to get out of town. And then sashing is pretty mindless stitching that helps enhance the relaxation of vacation.
Okay, it wasn’t totally mindless, but certainly took less thought than a brand new block. There were only two little gotchas on this batch of sashing.
Block C6 (upper right) was very lumpy because of all the layers. This time, I actually went through all the layers with my needle when stitching on the sashing, and it wasn’t as horrible as I thought. The stitches are pretty big near the center of each side where I was stitching through five layers, but otherwise it was not too bad. Most of it was through three layers. All four sides of this block are sashed now, so I’m moving on.
Block D5 (bottom left) was too big, but the sashing had to go where the tiny square points were, so I will just have to squish all that extra fabric in when I go to quilt the block. I feel like I’m getting to that “just get it done” point on the project. Especially after fussing so much with Triangle RR3.
And I was right, all these sashing blog articles are getting a little monotonous to write, and, I suspect, to read.
I’m trying to be as efficient as possible about the sashing so I can just crank them out. First, I sorted and rearranged the blocks to have one plastic baggie per section of the quilt:
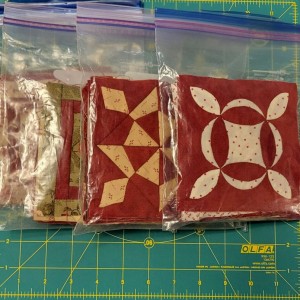
I’m currently working on sashing the center top segment of the quilt, so I’ve pulled out that baggie and marked the top of each block with a little chalk “T” in the seam allowance.
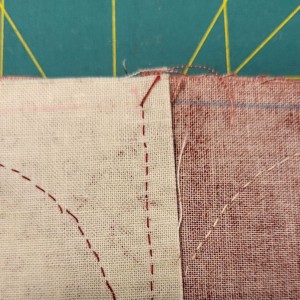
You can tell the photo above is of one of the earlier blocks I did, because the appliqué stitches are so big and the chalk pencil is blue.
I’ve chosen a cornerstone fabric for each one and pinned it to the block:
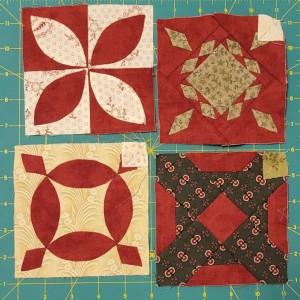
The top left block doesn’t have a cornerstone because it’s in the top row, which has no sashing on top.
This is the extent of my sashing prep so far. If I’m really smart, I’ll precut and mark a bunch of those 5″x1″ logs for the sashing, and then there really won’t be any prep at all to do. I can get right to work on sashing at a moment’s notice!
I’m now back after a brief break to count how many logs are needed to finish the rest of my sashing at this point. It’s 147, in case anyone is interested. That still seems like a lot of logs to cut ahead of time.
While cutting out the sashing logs for this batch of sashing, I had to cut a new yard of red fabric. For those that are keeping count, this is the seventh yard, including a yard that is being used only for sashing triangles.
If it seems like I’m going through yards at a faster rate lately, it’s because of the sashing, and more specifically, the triangle sashing. When I was working on the bottom triangle border, I cut the sashing triangles out of my current yard of red fabric, and it used up a big chunk of it.
Earlier this year, I decided to cut out a whole yard exclusively for the sashing triangles on the other three borders, so the regular red fabric yards should go more slowly now. I hope to get the rest of the blocks out of the yard I just cut, but we’ll see.
I’m now back after a brief break to calculate how much fabric I’ll need for 147 sashing logs. It’s just over 1/2 yard.
So, the jury is out on whether I can get everything cut out without starting on yard number eight, but it’ll be close. The sashing prep continues!