The triangle blocks that are built in horizontal “layers” make it relatively easy to ensure that you’re on track for the correct finished block size. You construct the bottom layer of the block, make sure it is 3″ tall (or whatever size it’s supposed to be), then construct the next section up, make sure it’s 2″ tall, then sew them together and make sure the combined unit comes out 5″ tall … you don’t have to wait till the entire block is completed to make sure you’ve done it right.
Not so with this block, which is definitely not in neat horizontal rows. In case you think that assembling in diagonal rows should be just as easy as horizontal ones, I refer you back to my first ever triangle block attempt. And that one was described as a beginner block. This triangle is labelled as advanced difficulty, and when they say advanced, they’re not kidding around.
Usually I don’t tackle difficult blocks at retreats, because I don’t want any witnesses when I’m swearing like a sailor and throwing the block to the floor in frustration. I’m not sure what I was thinking bringing the pieces for this one to retreat – it must have been temporary insanity. To make matters worse, I was tackling it on the Saturday of retreat, during walkabout – this is when everyone goes around visiting all the other quilters to see what they’re working on.
As usual, my friend Patsy came by to check out my progress, but didn’t announce to the room at large how insane I was to work on this, as she usually does during walkabout. Perhaps my insanity was self-evident this time.
One of the best tips I received after my struggles with that first triangle was to use Avery labels for “paper piecing” of these complicated blocks, and I definitely needed that technique to make this block a success. I’d printed out the pattern on Avery label paper at home, and started cutting out pattern pieces in the morning.
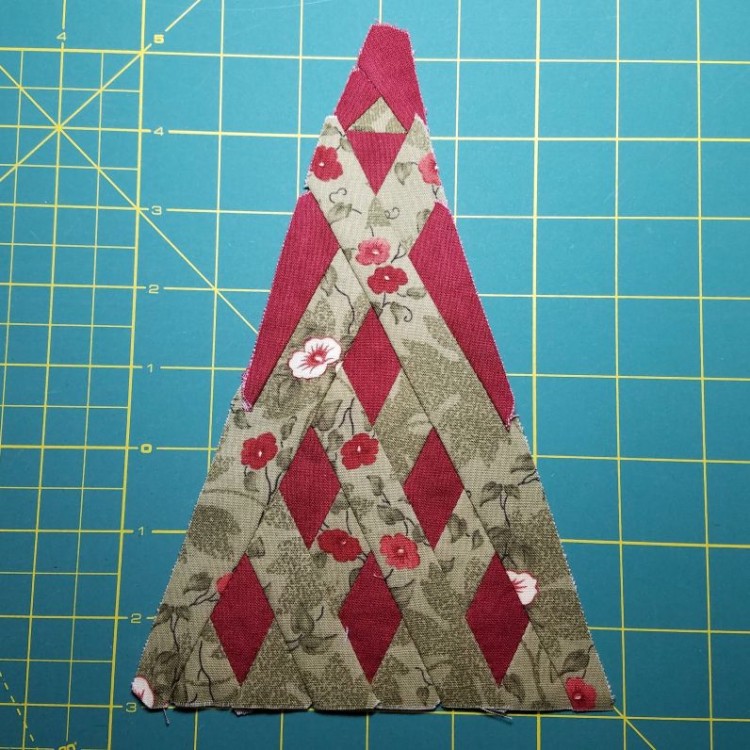
I tried to be somewhat more intentional about my fussy cutting on this one, after the weird motif placement on the basket block. It’s still a little odd, but the white flower placement is not quite as lopsided as on the other triangle I made with this fabric.
At lunch, I checked out the garage sale table and spent a dollar to pick up this book on making the “Nearly Insane” quilt:
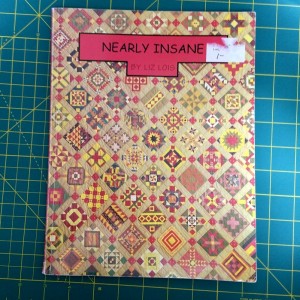
I joked about how this was going to be my next quilt project if I wasn’t already totally insane after finishing my Dear Jane quilt in 2028; my friend Becca agrees that it was worth spending $1 on the book just so I could tell that joke.
After lunch, I went back to work on the block. It took me most of the day, but I think the finished result looks pretty good. Once I got home and photographed this triangle for the blog, I realized the top section (with the little green triangle) leans slightly to the right, so I may go back and fix that at some point. In general, though, the Avery labels came through and the block is the size and shape intended.
The block took most of the day, and I was definitely ready for a simpler and more relaxing block … in the morning. After dinner, I switched gears and laid out the pieces for a scrappy miniature quilt I’ve been thinking about making:
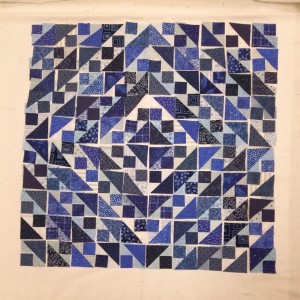
I’d cut out the pieces at the previous retreat, but needed to spend some time deciding which pieces of fabric went where. The quilt uses 25 different light blue fabrics and 25 different dark blue fabrics, and I wanted to arrange them randomly but in a way that made the quilt appear to “sparkle” as different fabrics caught the viewer’s eye.
This was just the sort of busy work I needed after a difficult day of piecing. I stifled yawns so I didn’t get sent home early for being too tired … but I ended up staying too late and getting overtired anyways. I needed rest to improve my insanity levels, so I’d be ready to tackle another block on my last day of retreat.
See? That $1 was so worth it!
The photo really shows off the blue fabric choices. I’m looking forward to seeing this miniature assembled!
B.
Thanks, Becca! I’m really looking forward to seeing it assembled too! 😀